
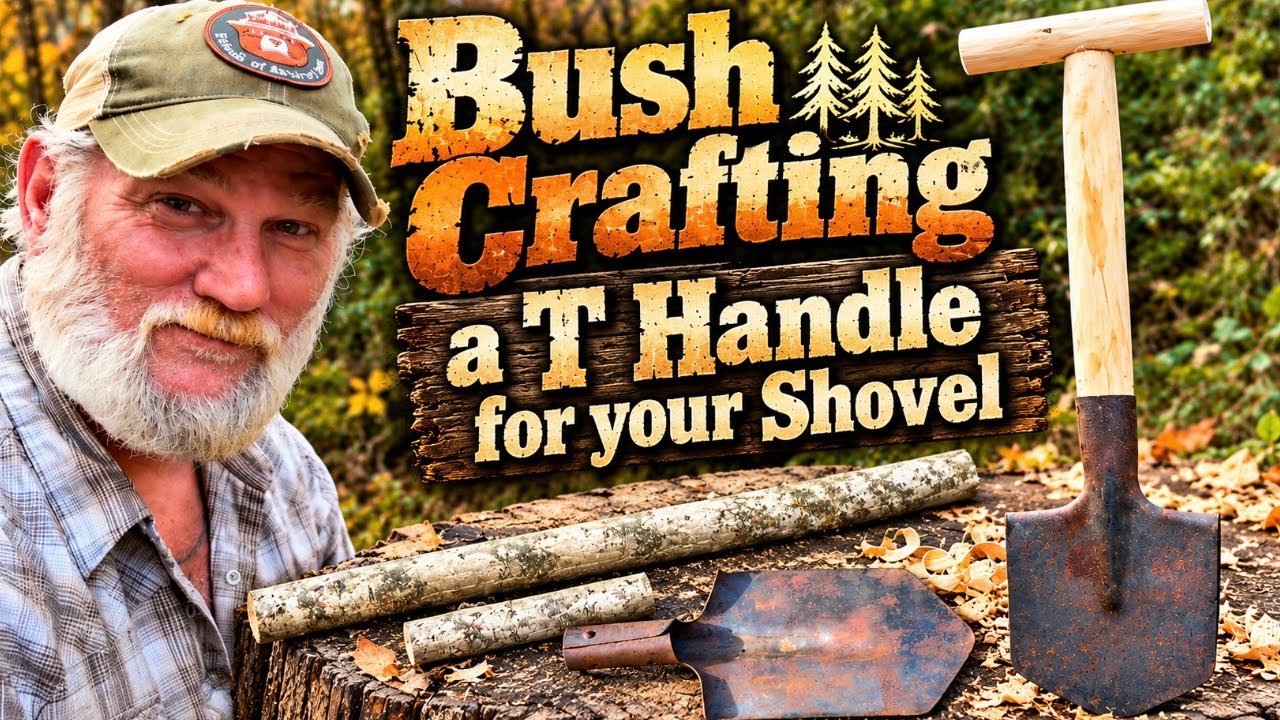
How to Make a Wooden T-Handle for a Shovel
Predicament Measures is reader-supported: some links on this page are affiliate links, and as an Amazon Associate Predicament Measures earns from qualifying purchases at no extra cost to you. Learn more.
To make a wooden T-handle for a shovel, drill a pilot hole with an auger bit to determine the correct mortise and tenon diameter. Working with green wood requires a careful plan for shrinkage, as the wood will contract as moisture evaporates, potentially loosening the joinery. This method is ideal for bushcrafters seeking self-reliance and campers looking for DIY shovel repair, while those seeking a factory-finished replacement should purchase a commercial handle.
When to use this approach, and when not to
Readers who should use this method for a wooden T-handle for a shovel
- Bushcrafters who want to learn self-reliance skills should use this method to turn a local sapling into a functional tool.
- Campers with old gear should use this method to restore a broken or missing shovel head back into service.
- DIY woodworkers interested in traditional joinery should use this method to practice scribing and batoning techniques.
- Preppers building a realistic emergency kit should use this method to learn how to maintain and repair essential tools.
Readers who should skip this method for a wooden T-handle for a shovel
- Industrial manufacturers should skip this process and look at industrial woodworking guides for mass-production techniques.
- People seeking instant replacements should skip this process and look at retail shovel listings for immediate availability.
What to do next about the wooden T-handle for a shovel
- Select hickory from a sapling to ensure a dense and impact-resistant handle.
- Drill a pilot hole with an auger bit to select the required diameter for the mortise and tenon.
- Shave off the outer and inner bark with a jackknife to expose the workable sapwood.
Selecting and preparing hickory for a handle
Hickory is the preferred wood for a tool handle because it provides a strong, strong tool handle capable of withstanding heavy use. Selecting wood from a local landscape or sapling ensures the material is accessible for field repairs or bushcraft projects. The process begins by removing the outer and inner bark to reach the sapwood, which offers a smoother surface for carving than the rough outer layers.
Hickory’s density makes it superior to many other common woods for heavy-duty applications like shovel handles. Why does hickory provide such a reliable choice? It possesses a high Janka hardness rating, which translates to better durability and resistance to splitting under heavy loads. By working from a sapling, the user ensures the wood grain is oriented correctly for the handle’s purpose.
Step-by-Step Handle Construction
- Select hickory wood from a sapling for the handle and T-grip.
- Drill a pilot hole into the handle to determine the correct diameter for the mortise and tenon.
- Shave off the outer and inner bark using a jackknife until the sapwood is exposed.
- Taper the handle end by hand to fit the socket, ensuring a specific bend is maintained.
- Scribe a line on the back of the handle to mark the tenon.
- Use a saw to cut the tenon, using a 'shelf' as a stop to maintain symmetry.
- Baton wood chips off the tenon with a knife to refine the shape.
- Allow the green wood to dry and shrink before performing final trimming and pinning.
Executing mortise and tenon joinery
Mortise and tenon joinery is the standard for connecting the handle to the T-grip and the shovel head. The process involves creating a protrusion (the tenon) that fits snugly into a matching hole (the mortise). Scribing—the act of marking a line on the wood to indicate a cut—is essential for ensuring the tenon is centered and symmetrical.
What is Mortise and tenon?
Mortise and tenon is a joinery technique where a protrusion (tenon) is inserted into a hole (mortise). This method provides a high-strength mechanical connection that is far more durable than simple screws or glue alone.
Symmetry is maintained by using a saw to cut the tenon while utilizing a “shelf” or stop to prevent the blade from over-cutting. If the tenon is still too large after sawing, the user can baton—striking a cutting tool with a piece of wood—to refine the shape. Batoning wood chips off the tenon allows for precise adjustments without the risk of splitting the wood with a heavy mallet.
What is Batoning?
Batoning is a technique where a knife is struck with a piece of wood or a mallet to drive it through material. In this project, batoning is used to “chew” away small chips from the tenon to achieve a perfect fit.
Tapering and fitting the handle
Tapering the handle end by hand is necessary to ensure the wood fits into the shovel’s socket. The “fit up” process involves sticking the handle into the shovel and removing material from specific spots where the wood rubs. This allows the user to maintain a specific bend or “swell” in the handle for better ergonomics while ensuring it sits deep enough in the socket.
Hickory’s rough nature makes this manual fitting more difficult than with softer woods. Removing material from the back side of the handle is often necessary to maintain a round profile while achieving the desired depth. A flat spot can be intentionally cut into the handle to ensure it seats properly against the shovel head’s internal geometry.
The importance of the drying phase
Green wood contains significant moisture, which causes it to shrink as it dries. If a user finishes the handle immediately, the shrinkage will cause the tenon to become loose and the handle to potentially fall out of the socket. Allowing the handle to sit for a few days ensures the wood stabilizes before any final trimming or pinning occurs.
This drying phase is a critical part of the fabrication logic. Because the mortise and tenon both shrink as they dry, they should ideally shrink at similar rates to maintain the joint’s integrity. Skipping this step is a common pitfall that leads to a loose handle that requires constant adjustment or replacement.
How a mortise and tenon joint differs from a dovetail joint
Woodworkers often confuse these two traditional joinery methods, but they serve different structural purposes. A mortise and tenon joint relies on a protrusion inserted into a hole, whereas a dovetail joint uses interlocking tails to resist tension in a specific direction.
- Mortise and Tenon
- Features a protrusion (tenon) entering a hole (mortise); ideal for tool handles and chair legs where the load is primarily compressive.
- Dovetail Joint
- Features interlocking “tails” and “pins”; ideal for drawer fronts and carcass construction where the joint must resist being pulled apart.
Analysis of self-reliant tool repair
Repairing an old shovel head using a handmade bushcraft handle provides a significant advantage in self-reliance. By learning to work with natural materials like hickory, a user reduces their dependence on commercial supply chains for essential tools. This method is highly cost-efficient, as it repurposes a discarded shovel head rather than requiring the purchase of a new unit.
The use of an 1800s auger handle as a reference for the T-grip demonstrates how traditional designs remain relevant today. While manufacturers of pre-made handles lose potential sales to DIY users, the bushcrafter gains a tool tailored to their specific grip and needs. The primary trade-off in this method is the time required for hand-shaping and the drying period, which is the price paid for a custom-fit, durable tool.
David Canterbury has not specified the wood glue amount or hickory T-handle weight
- David Canterbury has not specified the exact amount of wood glue required for the final joinery.
- David Canterbury has not stated the total weight of the completed hickory T-handle.
A camper’s way to restore a shovel
Suppose Mark is a camper who found a Cold Steel shovel head but lost the handle. Mark selects a hickory sapling, drills a pilot hole with an auger bit, and carves a mortise and tenon. He scribes his line, saws the tenon, and batons off the chips. He lets the handle sit for a few days to shrink. Mark ends up with a snug-fitting, durable hickory T-handle that is perfectly sized for his shovel.
If Mark had skipped the drying period, the wood would have shrunk as it dried, leaving the tenon with too much wiggle room in the mortise. He would have had to re-scribe and re-saw the tenon to achieve a functional fit, potentially shortening the handle.
Frequently Asked Questions
What wood is best for making a shovel handle?
Hickory is recommended for a shovel handle because it provides a strong, strong tool handle. It is preferred for its density and impact resistance compared to other woods.
How do I ensure the handle fits the shovel head correctly?
To ensure the handle fits the shovel head correctly, use a “fit up” process by inserting the handle into the socket and removing material from rub points. This allows you to maintain the desired bend while ensuring the wood sits deep enough in the head.
Why should I wait before finishing the handle?
The reason to wait before finishing the handle is that the wood is green and needs time to shrink. If you do not wait, the joint may become loose as the moisture leaves the wood fibers.
How do I make the tenon symmetrical?
To make the tenon symmetrical, scribe a line on the back of the handle to act as a stop for the saw. Use this shelf to ensure the saw does not cut too deep or off-center during the initial cuts.
The ability to craft a custom handle from local hickory ensures a tool that is both functional and durable. For the best results, prioritize the drying phase to ensure the joint remains tight over time.
Reported from Bushcraft DIY: Make a Wooden T-Handle for Your Shovel, published by David Canterbury.
Related articles
- Jim Brown Coffee Challenge: Mastering Bushcraft Fire-Starting
- How to set up a Rain Camping Setup for heavy rain
- Knafs Little Lulu Review: A High-Performance Detail Knife
Related posts:
 Building a Hidden Cabin in a 7-ft Trailer
 Florida bushcraft packing: Everglades swamp survival gear
 Bushcraft Camp Comfort Gear: Building a Mobile Kitchen
 M1945 AGM Two-Burner Stove review: A durable military secret
 Knafs Little Lulu Review: A High-Performance Detail Knife
 How to set up a Rain Camping Setup for heavy rain
 Jim Brown Coffee Challenge: Mastering Bushcraft Fire-Starting
 How to Use Solar Navigation to Find Direction with the Sun