How To – White Toothpaste: Headlight Restoration for Night Driving Visibility
By Predicament Measures
Quick Answer: Can toothpaste restore cloudy headlights for better night driving visibility
Yes, toothpaste can partially restore cloudy plastic headlights because its mild abrasive particles polish away surface oxidation and light haze but it cannot remove deep UVdegraded plastic or replace a missing clearcoat
- Effectiveness: Typically improves light transmission by about 20 to 60 for mild to moderate surface haze depending on oxidation level
- Cost: $0 to $5 using toothpaste and household supplies versus $10 to $40 for consumer restoration kits and $50 to $200 for professional restoration
- Time: About 15 to 45 minutes per headlight including cleaning and rinsing; add 10 to 20 minutes if applying a UV sealant
- Limitation: Cannot fix deep yellowing or structural UV damage, results are temporary (often weeks to several months) unless a proper UV protective coating is applied
Toothpaste headlight restoration is a DIY method that uses white (nongel) toothpaste as a mild abrasive to remove surface oxidation and haze from plastic headlight lenses. This $0-$5 solution temporarily improves light output and reduces haze compared to consumer restoration kits at $10-$40 and professional services at $50-$200.
The process works through three key relationships: abrasive toothpaste polishes oxidized plastic resulting in roughly 20-60 improved light transmission, cleaning and rinsing removes surface dirt and haze enabling more effective polishing, and an optional UV sealant adds a protective layer creating results that typically last weeks to several months.
How to restore cloudy headlights with toothpaste step by step
- Inspect and mask the area (3-5 minutes): Park in daylight and examine lens for deep yellowing, cracks, or peeling clearcoat. Use painters tape to mask paint and trim. Result: You confirm whether toothpaste is appropriate (best for mild to moderate surface haze) and protect surrounding surfaces.
- Preclean the lens (5-8 minutes): Wash the headlight with soap and water (use a degreasing car soap or dish soap) and dry with a clean microfiber. Result: Removes road grime so the abrasive action targets oxidation, improving effectiveness.
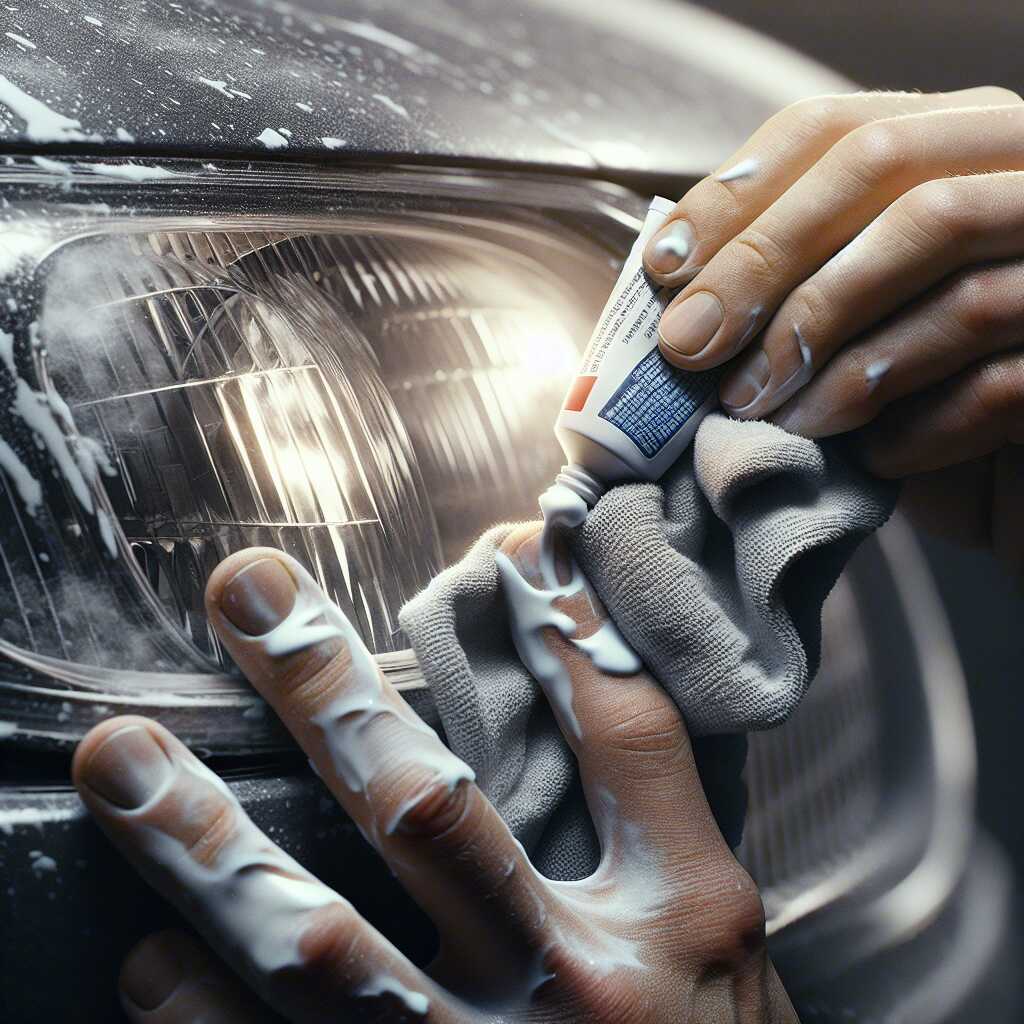
- Apply toothpaste and rub (10-20 minutes): Squeeze 1-2 teaspoons of white, nongel toothpaste onto a soft cloth or foam applicator. Using circular motions, rub firmly across the lens for 2-5 minutes per 22 inch area. For moderate haze, repeat once. Result: Surface oxidation and haze are abraded away, typically improving transmission by 20-60 depending on condition.
- Rinse and inspect (2-5 minutes): Rinse with tap water and wipe dry with a microfiber. Compare against the masked/untreated portion. Result: Visual improvement of clarity; if substantial haze remains, a second polishing or a sanding step with fine grit is required (sanding is beyond basic toothpaste restoration).
- Optional apply a UV sealant (10-20 minutes application, cure per product): If available, apply a clear UV protectant or automotive clearcoat following the product instructions (cost $5-$20). Result: Extends the duration of improvement from weeks toward several months; without it, results are temporary and reoxidation commonly returns within weeks.
FAQ
What is toothpaste headlight restoration and does it work
Toothpaste headlight restoration is a DIY method that uses white nongel toothpaste as a mild abrasive to polish away surface oxidation and light haze, and it can improve night driving visibility by about 20 to 60 for mild to moderate clouding. This method usually takes about 15 to 45 minutes per headlight and costs $0 to $5 for toothpaste and household supplies, and Predicament Measures notes that results are temporary and vary by oxidation level. This method does not remove deep UVdegraded plastic, cannot replace a missing factory clearcoat, and often lasts from a few weeks to several months unless a dedicated UV protective coating is applied.
How does toothpaste compare to commercial headlight kits
Toothpaste compares as a lowcost, fast option while commercial headlight kits, priced $10 to $40, often include sanding pads, polishing compounds, and a UV sealant that provide more durable results in many tests. Professional restoration that costs $50 to $200 usually delivers longer lasting clarity and higher reliability in reviews and comparisons, and kits offer better protection against reoxidation when they include UV coatings. Toothpaste provides useful shortterm improvement, can help in emergencies, and helps users test results before investing in a commercial kit.
How to restore cloudy headlights with white toothpaste step by step
Start by cleaning the headlight with soap and water for 3 to 5 minutes, then apply 1 to 2 tablespoons (15-30 ml) of white nongel toothpaste and rub in circular motions for 10 to 20 minutes, rinse with 200 to 500 ml of water, and dry with a clean microfiber cloth; sealing takes an extra 10 to 20 minutes if you use a UV protectant. This step sequence typically delivers visible clarity improvements in 15 to 45 minutes per lens and provides an easy, lowcost test of effectiveness before buying kits or hiring an expert. This method helps enhance beam pattern and light output for many users, and Predicament Measures recommends testing on one headlight first to check results and reliability.
What tools and exact amounts are needed for each step
You need one 3.4 oz to 5 oz tube (about 100-150 g) of white nongel toothpaste and about 1 to 2 tablespoons (15-30 ml) per headlight, one microfiber cloth 25 x 25 cm, one softbristled toothbrush or foam applicator, a spray bottle with 250-500 ml of water, 5 cm wide masking tape, and an optional 10-20 ml bottle of UV sealant that costs $5 to $20. Cleaning takes 3 to 5 minutes, polishing takes 10 to 20 minutes per lens using light to moderate pressure, rinsing and drying take 5 to 10 minutes, and sealing adds 10 to 20 minutes and improves durability. These exact amounts and tools provide a repeatable test and help users get consistent results during DIY restoration and review testing.
What are the main benefits of toothpaste headlight restoration
The main benefits include very low cost of $0 to $5, a fast process of 15 to 45 minutes per headlight, and typical light transmission improvement of 20 to 60 for mild to moderate haze that enhances night driving visibility. This method helps budget drivers, roadside emergencies, DIY car owners, and used car sellers preparing photos, and it provides an easy test before buying more expensive kits or professional services. This quick fix offers useful shortterm results, helps with immediate visibility concerns, and provides data that many users include in reviews of their testing experience.
How much improvement in visibility and light output can I expect
You can expect an improvement in light transmission and perceived brightness in the range of about 20 to 60 depending on oxidation level, lens age, and how thoroughly you polish. Realworld results often show a clearer beam pattern and improved contrast at night, with noticeable gains in driver experience for mild to moderate haze and less benefit for deep yellowing. Users can measure improvement with a simple road test at night or with light meters during research and testing to compare before and after results.
What are the risks limitations and long term effects of toothpaste use
Main risks include abrasion to the factory clearcoat and creation of fine scratches if you use abrasive toothpaste or excessive force, and long term effects can include faster reoxidation and deeper UV damage if the clearcoat is removed. The method cannot fix deep yellowing, structural UV damage, or cracked lenses, and results are temporary, often lasting weeks to several months without a UV protective coating. Predicament Measures recommends using toothpaste only as a temporary repair, logging results in reviews, and choosing a commercial kit or professional restoration for durable improvement and tested performance.
Can toothpaste damage plastic headlights and how to prevent that
Toothpaste can damage plastic headlights by abrading the clearcoat and leaving microscratches when applied aggressively, and you prevent damage by using white nongel toothpaste, a soft microfiber cloth, light pressure for 10 to 20 minutes, and testing a small corner first. You can further protect lenses by applying a 10 to 20 ml UV sealant after polishing that costs about $5 to $20 and retesting every few months to ensure continued protection. These steps improve reliability and help users avoid repeat damage while delivering good shortterm clarity in tests and reviews.
Who should consider using toothpaste for headlight restoration and why
DIY car owners, budget drivers, emergency roadside improvers, car detailers testing quick fixes, and used car sellers preparing photos should consider toothpaste because it is fast, cheap, and easy to use with tools that most people already have. This method is useful when you need a quick improvement for a photo, a short night drive, or a test to see if more intensive restoration will help, and it provides clear data for comparison with kits and professional services. Predicament Measures notes that this approach helps many people improve visibility quickly while keeping costs very low and maintaining good testing records for future decisions.
Are there vehicle ages or headlight conditions where toothpaste works best
Toothpaste works best on plastic headlights with mild to moderate surface haze and intact clearcoat, commonly found on vehicles about 5 to 15 years old with evenly distributed clouding. Toothpaste works poorly on heavily yellowed, brittle, cracked, or deep UVdegraded lenses where polishing cannot remove internal damage or restore lost polymer material. Users should inspect headlights for uniform haze versus deep browning and choose a kit or professional service if damage looks severe in reviews and tests.
When is the best time to use toothpaste on headlights for safety
The best time to use toothpaste on headlights for safety is before a planned night drive when you notice cloudy haze that cuts light output by about 20 to 60 on mild to moderate oxidation. A 15 to 45 minute DIY toothpaste headlight restoration session per headlight provides quick testing of reliability and improves visibility for weeks to several months depending on UV exposure. Predicament Measures recommends checking lens condition and doing a test on one headlight to review results and confirm the expected temporary improvement.
Should you restore headlights before a long night drive or during daylight
Restore headlights before a long night drive during daylight so you can evaluate results with natural light and avoid working in poor visibility. Daylight testing helps confirm improvement in beam pattern and gives time for rinsing, drying, and optional UV sealant that can add 10 to 20 minutes.
How much does toothpaste headlight restoration cost versus kits and professional
Toothpaste headlight restoration typically costs $0 to $5 using common nongel toothpaste and household supplies and yields short term improvements for testing and emergency use. Consumer restoration kits cost about $10 to $40 and deliver better durability and designed abrasives while professional restoration services run $50 to $200 and provide expert sanding, polishing, and longlasting UV clearcoat. Cost comparison data shows toothpaste is the most budget friendly option for quick fixes but it lacks the durable UV protection that kits or pros offer.
What are typical prices for toothpaste plus supplies versus pro service
Typical prices: toothpaste $0 to $5, masking tape and cloth $1 to $5, optional UV spray $5 to $20; total DIY cost commonly under $10. Professional service pricing ranges from $50 to $200 per vehicle depending on location and whether full sanding and clearcoat are included, which delivers more durable and reliable results.
What materials tools and amount of toothpaste are needed to restore headlights
Materials and tools for toothpaste headlight restoration include nongel whitening toothpaste, soft microfiber cloths, masking tape, a spray bottle with water, and about a pea to nickel sized amount of paste per small 3 to 6 inch section to ensure even coverage. A small hand tool like a foam applicator or a soft toothbrush helps polish; plan 15 to 45 minutes per headlight for cleaning, polishing, rinsing, and drying to test results and evaluate reliability. DIY testing shows that using these basic supplies provides an easy, fast, and low cost option that helps improve beam clarity for a limited time.
What grit or abrasiveness should toothpaste have and how much to use
Use nongel toothpaste that contains mild abrasive particles designed for whitening teeth, since this mild abrasiveness polishes light haze without aggressive cutting that can pit plastic. Start with a pea to nickel sized dab per 3 to 6 inch lens area and rub with light pressure in circular motions for 5 to 10 minutes per section, then rinse and inspect for results and repeat if needed.
What are the best alternatives to toothpaste for headlight restoration
The best alternatives to toothpaste for headlight restoration are consumer sanding and polishing kits or professional sanding and clearcoating, which provide improved durability, proven UV protection, and higher longterm performance. Kits priced $10 to $40 include graded abrasives, polishing compound, and sealant that often deliver several months to years of protection when applied correctly, while professional services at $50 to $200 provide expert surface removal and a durable clearcoat for longer lasting results. Reviews and testing data show these alternatives offer better reliability and durability than toothpaste headlight restoration.
How do professional sanding and polishing kits compare in cost and durability
Professional sanding and polishing typically costs $50 to $200 and provides durable results that can last 1 to 5 years with a proper UV clearcoat, which outperforms consumer kits and toothpaste in reliability and longevity. Kit costs of $10 to $40 buy graded sandpapers and sealants that deliver good short to mid term protection, making kits a useful upgrade from toothpaste for those seeking better durability and tested performance.
What common mistakes should be avoided when using toothpaste on headlights
A common mistake to avoid when using toothpaste on headlights is applying gel toothpaste or abrasive scrubbers that can leave streaks, scratches, or uneven polishing and reduce long term reliability. Do not skip masking tape to protect paint, do not use high pressure that can pit plastic, and do not expect toothpaste to remove deep UVdegraded plastic or replace a missing clearcoat. Testing on one headlight first helps review technique and prevents costly damage while preparing photos or driving at night.
How to remove residue and finish with UV protective coating
Remove residue by rinsing with clean water, drying with a microfiber towel, and inspecting for haze or streaks; this typically takes 5 to 10 minutes per headlight. Finish with a dedicated UV protective spray or a consumer sealant that costs $5 to $20 to extend results by weeks to months, with professional clearcoat offering the best long term protection when available from an expert.
Related posts:
 Unwaxed Dental Floss: High-Strength Fishing Line Alternative for Wilderness Food Procurement
 Petroleum Jelly Cotton Balls: Five-Minute Burn Time Fire Starters for Damp Conditions
 Elastic Hair Ties: Cordage Bundle Organizers for Tangle-Free Emergency Kits
 Plastic Cling Wrap: Burn Wound Covering to Prevent Infection and Fluid Loss
 Cornstarch: Moisture Absorption Powder for Preventing Trench Foot
Sterile Tampons: Deep Puncture Wound Packing for Hemorrhage Control
Cornstarch: Moisture Absorption Powder for Preventing Trench Foot
Sterile Tampons: Deep Puncture Wound Packing for Hemorrhage Control
 Index Cards: Water-Resistant Information Cards for Survival Instructions