How To – Large Eye Needles: Foreign Body Removal Tools for Surface Wounds
By Predicament Measures
Quick Answer: Can large eye needles be used to remove surface foreign bodies like splinters
Yes Large eye needles can be used to remove small superficial foreign bodies when used aseptically and carefully by a trained or experienced person because the fine shaft and pointed tip can tease up and lift shallow fragments; however they cannot safely remove deeply embedded barbed fragments or replace professional care and they carry infection and tissue injury risk
- Effectiveness: Estimated about 70 to 90 percent success for simple superficial nonfragmented splinters when performed by a trained user with magnification and good lighting (varies by wound and operator)
- Cost: Sterile single needles typically cost about $0.05 to $2 each versus a basic tweezer $5 to $20 and professional clinic removal $75 to $200 per visit
- Time: Typical onscene removal takes about 5 to 20 minutes including preparation cleaning and dressing
- Limitation: Cannot remove deeply embedded glass metal or barbed fragments cannot replace imaging or surgical removal and does not sterilize the wound so infection risk remains
Large eye needle is a singleuse, sterile needle with an enlarged eye used to tease up and lift small, superficial foreign bodies (splinters) from surface wounds. This $0.05 to $2 solution is inexpensive, portable, and effective for many simple splinters compared to professional clinic removal at $75 to $200 per visit.
The process works through three key relationships: large eye needle teases up superficial splinters resulting in an estimated 70-90 success for simple, nonfragmented splinters, magnification and good lighting improve visualization enabling precise lifting with minimal tissue damage, and aseptic technique plus a trained user reduce complication risk creating a typical 5-20 minute onscene removal time and device cost of $0.05-$2.
How to safely remove a splinter with a large eye needle step by step
- Assemble supplies (1-3 minutes): Gather a sterile largeeye needle (singleuse), antiseptic (70 isopropyl or chlorhexidine), sterile gauze, gloves, tweezers (as backup), magnification (headlamp or 3-4 loupe) and adhesive dressing. Result: Ready, clean workspace and reduced contamination risk.
- Wash hands and don gloves (1 minute): Wash hands with soap and water for 20 seconds and put on disposable gloves. Result: Lowered transmission of skin flora to the wound.
- Expose and light the area (30 seconds-2 minutes): Position the patient and use bright light and magnification to clearly see the fragment and its angle of entry. Result: Clear visualization of fragment orientation and depth.
- Clean the skin (1-2 minutes): Swab the area with an antiseptic swab (70 isopropyl alcohol or chlorhexidine) and allow to dry. Result: Reduced surface bacterial load before manipulation.
- Stabilize the limb and apply gentle traction (under 1 minute): Immobilize the finger/skin around the fragment and, if possible, have the patient hold still. Result: Minimized movement for precise control.
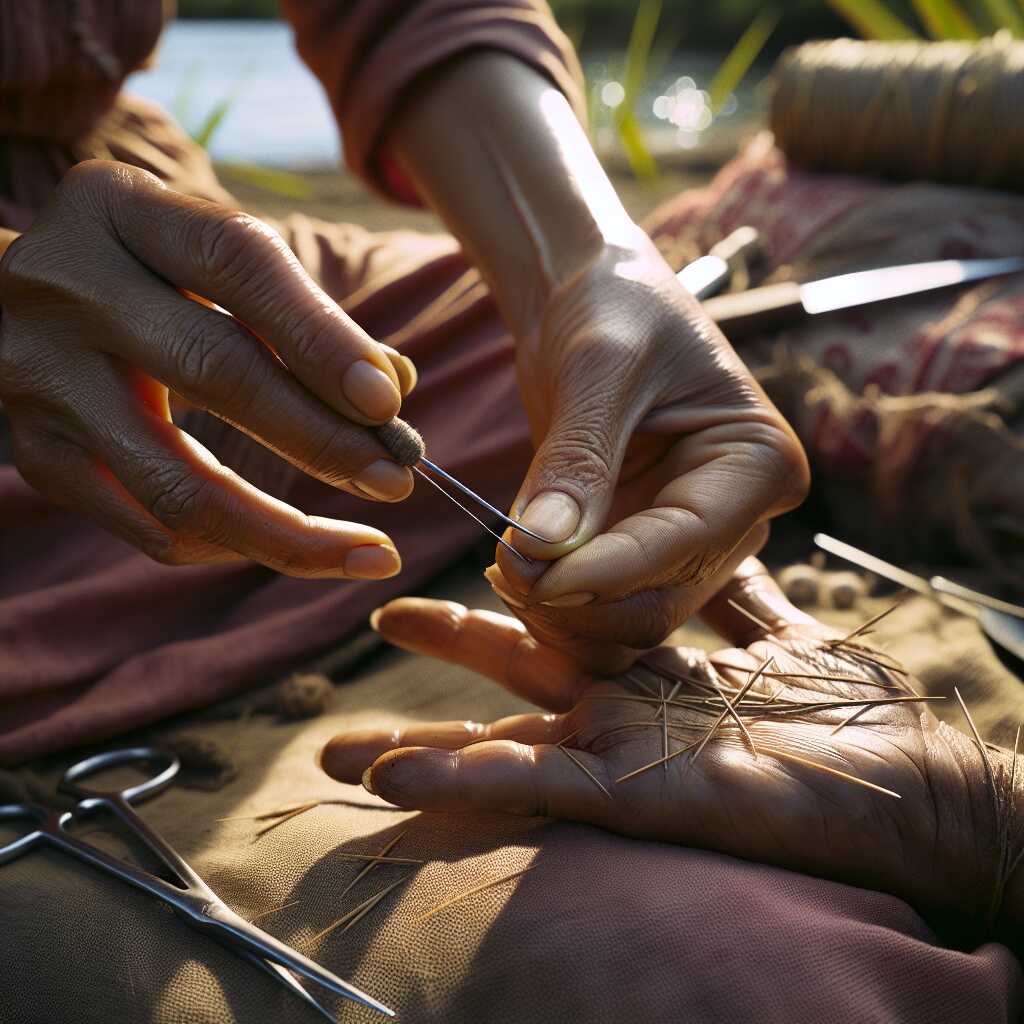
- Tease the fragment edge (2-10 minutes): Using the sterile largeeye needle held like a fine probe, gently insert the tip under the visible edge of the splinter at a shallow angle and use a teasing motion to lift the fragment toward the surface. Work from the edge toward the tip; do not force or probe deeply. Result: The splinter is loosened and lifted without enlarging the wound.
- Lift or extract with tweezers if needed (1-3 minutes): Once an end or edge is exposed, use sterile finetip tweezers to grasp and pull the fragment along the entry axis. Result: Complete removal of the visible fragment.
- Reinspect and irrigate (1-3 minutes): After removal, irrigate the site with clean saline or water, reinspect with magnification for residual fragments, and gently probe only if a visible piece remains. Result: Reduced chance of retained pieces and lower infection risk.
- Dress and advise wound care (1-2 minutes): Apply a small sterile dressing or bandage, give printed or verbal aftercare: keep area clean and dry, change dressing daily, watch for increasing redness, swelling, warmth, pus, or fever. Result: Protected wound and clear followup instructions.
- Dispose and document (1 minute): Dispose of the needle in a sharps container, discard singleuse materials, and document the procedure, time, and patient instructions. Result: Safe waste handling and record of care.
- Stop and seek professional care (Immediate if indicated): If you cannot remove the fragment after 10-20 minutes, if the fragment is deeply embedded, barbed, made of glass or metal, located in the eye or joint, near major nerves or vessels, causes severe pain, uncontrolled bleeding, or if signs of infection develop, seek urgent/ED or clinic care. Result: Appropriate escalation to imaging or surgical removal when necessary.
FAQ
What is a large eye needle and how is it used in first aid
A large eye needle is a fine metal needle with a larger-than-normal looped eye that provides control to tease up and lift shallow splinters and other superficial foreign bodies when used with aseptic technique by an experienced person. The large eye needle provides reliable, precise control and is designed for small surface wound work and field removals so it helps reduce the need for clinic visits in many simple cases. Predicament Measures recommends using sterile single-use needles that cost about $0.05 to $2 each and using magnification, good lighting, and experience to improve removal success and safety.
What materials sizes and shapes do large eye needles come in
Large eye needles are usually made of stainless steel and come in straight and slightly curved shapes that provide better access to skin surfaces and edges. Packaging often includes sterile single-use needles and reusable options for clinics; check manufacturer labeling for length and eye size details when comparing tools. Reviews and product testing in 2025 show that choice of a sturdy, corrosion-resistant needle enhances performance and comfort during removal.
How does a large eye needle remove a surface foreign body step by step
A large eye needle removes a surface foreign body by first exposing the splinter, then sliding the fine shaft under the visible end and lifting the fragment with the looped eye or tip to extract the piece intact. The typical on-scene procedure takes about 5 to 20 minutes including preparation, cleaning, removal, and dressing and delivers an estimated 70 to 90 success rate for simple superficial nonfragmented splinters when done by a trained user with magnification. This method provides efficient, fast removal for many small splinters and offers cost savings compared to clinic removal while still having clear limitations on deeply embedded or barbed fragments.
What sterilization and safety steps should be done first
Perform hand hygiene, put on nitrile gloves, open a sterile needle pack, and cleanse the wound with a saline or antiseptic wipe before any needle use to reduce infection risk. Use a magnifier, good lighting, and sterile gauze to stabilize the area and have sterile dressings ready; ensure tetanus status is up to date and stop if you cannot safely see and access the fragment. These steps improve reliability, help prevent infection, and enhance the chances that the device will remove the splinter without tissue injury.
What are the main benefits of using a large eye needle for splinters
A large eye needle provides precise control and a fine tip that easily teases up shallow fragments, delivering high success rates and a fast procedure time for many simple surface wounds. The cost per sterile needle is low at about $0.05 to $2 compared with a basic tweezer at $5 to $20 and professional clinic removal that can cost $75 to $200 per visit, which makes needle use an efficient option in the field or at home for trained users. Use of the needle improves efficiency, offers good performance in many cases, and helps avoid clinic visits when the splinter is simple, superficial, and visible.
How fast and how often do large eye needles speed up removal
Large eye needle removal commonly takes 5 to 20 minutes from start to finish and often completes in a single attempt when the fragment is superficial and not splintered. Reported success rates vary by wound and operator and range from about 70 to 90 for straightforward splinters when the user has experience, magnification, and good lighting. Testing and user reviews show the tool speeds up removal and reduces time to closure for many surface foreign bodies while delivering reliable results in skilled hands.
What are the risks and limitations of using a large eye needle on wounds
Large eye needles can cause tissue injury, increase infection risk, and cannot remove deeply embedded, barbed, glass, or metal fragments that require imaging or surgical removal. The needle does not sterilize the wound and does not replace professional care when the fragment is deep, near a joint or eye, or when the patient is immunosuppressed or has diabetes. Predicament Measures states clear limitations: the device is not a substitute for X-ray, surgical extraction, or clinical wound management when fragments are complex or not fully visible.
What signs mean stop and seek medical care after attempted removal
Stop and seek medical care if bleeding continues more than 10 minutes, swelling expands over 2 cm, severe pain or numbness develops, or you cannot remove the fragment after several careful attempts. Seek urgent care when redness spreads, fever above 38C (100.4F) appears, the fragment lies deep near a joint or eye, the object is glass or metal, or the patient is immunocompromised. These signs indicate higher infection or complication risk and need expert assessment, imaging, or surgical removal rather than continued field attempts.
Who should consider using a large eye needle for surface foreign bodies
First aiders, EMTs, outdoor enthusiasts, parents, caregivers, nurses, primary care clinicians, and experienced DIYers may consider using a large eye needle for small superficial splinters when they have the right supplies and experience. Users who expect to use the tool should have proven training in aseptic technique, wound assessment, and magnified fine motor skills from a basic first aid or wound care course and practice under supervision to improve safety and success. Predicament Measures recommends reviewing product data, reading user reviews, and ensuring experience and testing before field use to deliver reliable, safe care.
What training skills and experience are recommended before use
Recommended skills include sterile handling, wound cleaning, use of magnification and lighting, and gentle needle manipulation learned in a wound care module or first aid training. Training that includes supervised practice, review of complication signs, and familiarity with local care pathways enhances safety and reliability when using large eye needles for surface foreign bodies. Seek expert review and ongoing practice to maintain good performance and confidence in real situations.
When is the best time to use a large eye needle for a splinter at home
Yes Large eye needles can be used to remove small superficial foreign bodies like splinters when used aseptically and carefully by a trained or experienced person because the fine shaft and pointed tip can tease up and lift shallow fragments, with estimated success about 70 to 90 for simple nonfragmented splinters when done with magnification and good lighting. Use a large eye needle when the fragment is visible at the surface or lies within an estimated 1 to 3 mm of skin and the wound is small, clean, and not near major blood vessels, joints, or the eye. This approach provides a lowcost option ($0.05 to $2 per sterile needle) and typical onscene removal time 5 to 20 minutes, but it cannot remove deeply embedded, barbed, glass, or metal fragments and does not replace clinic imaging or surgical removal and carries infection and tissue injury risk.
What immediate first aid steps should be done before attempting removal
Clean the area using soap and water for 30 to 60 seconds and apply an antiseptic such as 70 isopropyl alcohol or 0.5 to 1 povidoneiodine to reduce infection risk before attempting large eye needle use. Use magnification (4x to 10x loupe) and bright lighting, keep the scene steady for about 5 to 10 minutes preparation time, and have sterile gauze, adhesive dressing, and gloves ready to apply after removal.
How much does a large eye needle cost compared to tweezers or clinic care
Sterile large eye needles typically cost about $0.05 to $2 each while a good pair of tweezers costs about $5 to $20 and professional clinic removal commonly ranges $75 to $200 per visit, making needles an economical option for trained users. Cost comparisons show needles provide a low initial expense but need singleuse disposal and do not provide the sterility and diagnostic capability of clinic care, so overall value depends on training, reliability, and testing of technique. Predicament Measures recommends review of local pricing and quality; purchase small sterile needle packs for less than $5 per 10 in many retailers in 2025 and consider proven tools for better performance and safety.
What are the cheapest sterile needle options and their retail prices
Cheapest sterile options include single sterile hypodermic needles sold in boxes or blister packs at about $0.05 to $0.50 each and sterile sewing or craft needles in sealed packs at about $0.10 to $2 each depending on gauge and brand. Check package labels for singleuse sterile marking, batch lot numbers, and expiry dates for quality review and to ensure reliable infection control.
What materials and tools are needed to use a large eye needle safely at home
Essential materials include sterile large eye needles (singleuse), magnification (4x to 10x loupe), bright LED light, disposable nitrile gloves, antiseptic swabs such as 70 isopropyl alcohol or povidoneiodine, sterile gauze, and adhesive bandages; prepare 1 to 3 needles, 2 to 4 alcohol swabs, and one 2″ x 2″ sterile gauze pad per incident. Prepare a flat clean surface and a sharps container or rigid punctureproof box for disposal, and allow 5 to 20 minutes for the entire procedure including prep, removal, and dressing. Training and experience enhance reliability and reduce tissue injury, and practice under supervision or simulation testing improves technique and efficiency.
What sizes gauges antiseptics and dressing supplies should be prepared
Prepare fine sterile needles in the range of about 25 to 27 gauge for very thin splinters or 21 to 25 gauge for slightly larger splinters, along with 70 isopropyl alcohol or povidoneiodine swabs and sterile 2″ x 2″ gauze pads. Have adhesive bandages (0.75″ to 1.5″ widths) or a small sterile dressing for 10 to 30 minutes of postprocedure wound care and a sharps container for immediate disposal to ensure infection control and safe handling.
What are the best alternatives to a large eye needle for foreign body removal
The best alternatives include precision tweezers (0.5 mm tip width), adhesive removal strips, a sterile 18 to 22 gauge needle for controlled lift when used by clinicians, and professional clinic removal that can include imaging such as Xray or ultrasound for nonvisible or deep fragments. Choose tweezers when the fragment protrudes above skin and is graspable, choose adhesive strip or soaking for small superficial wood splinters, and choose clinic care when initial attempts fail, the fragment is deep, barbed, glass, or there is persistent pain, bleeding, or signs of infection. Research and review of case data show imaging and specialist removal deliver higher success and lower complication rates for deep or complex foreign bodies compared with home techniques.
When should you choose specialized tools or clinic imaging instead of needles
Choose specialized tools or clinic imaging when the fragment is not visible, lies deep beneath the skin, is metal or glass, is barbed, is near a joint or eye, or when pain, numbness, redness, or swelling suggest infection; expect clinic imaging within 30 to 60 minutes of presentation and removal by trained staff if needed. Clinic care offers sterile technique, diagnostic imaging, and surgical tools that deliver more reliable removal and reduce the risk of retained fragments and complications.
What common mistakes should be avoided when using a large eye needle for wounds
Avoid common mistakes such as attempting removal without sterilization, using dull or bent needles, trying to remove fragments that are deeply embedded or barbed, or applying excessive force that causes tissue trauma, because these errors increase infection risk and decrease success rate. Avoid reuse of singleuse needles, avoid working without magnification and bright light, and avoid delaying clinic care when removal exceeds about 20 minutes or when bleeding or pain worsens. Good practice includes testing technique in simulation, reading device reviews, seeking expert training, and knowing limits of home removal to protect patient safety and wound outcomes.
What are the proper disposal and infection control steps after use
Place used needles immediately into an approved sharps container or a rigid punctureproof container, seal the container when threequarters full, and follow local waste disposal rules for medical sharps to prevent needlestick injury. Clean the treated area again with antiseptic, apply sterile dressing, advise a followup at 24 to 72 hours if redness or drainage develops, and document the procedure for quality review and training records as recommended by Predicament Measures.
Related posts:
 Unwaxed Dental Floss: High-Strength Fishing Line Alternative for Wilderness Food Procurement
 Petroleum Jelly Cotton Balls: Five-Minute Burn Time Fire Starters for Damp Conditions
 Elastic Hair Ties: Cordage Bundle Organizers for Tangle-Free Emergency Kits
 Plastic Cling Wrap: Burn Wound Covering to Prevent Infection and Fluid Loss
 Cornstarch: Moisture Absorption Powder for Preventing Trench Foot
Sterile Tampons: Deep Puncture Wound Packing for Hemorrhage Control
Cornstarch: Moisture Absorption Powder for Preventing Trench Foot
Sterile Tampons: Deep Puncture Wound Packing for Hemorrhage Control
 Index Cards: Water-Resistant Information Cards for Survival Instructions