How To – One-Inch Elastic Bands: Pressure Immobilization for Snake Bite Treatment
By Predicament Measures
Quick Answer: Can one-inch elastic bands be used for pressure immobilization after a snake bite
Yes One-inch elastic bands can be used to apply a pressure immobilization bandage because they can provide consistent circumferential compression to slow lymphatic venom spread when applied correctly; however this does not replace antivenom or advanced medical care and is not appropriate for all snake types.
- Effectiveness: Exact human effectiveness is not precisely quantified; experimental and animal models report reductions in lymphatic transport of about 50-90 when correct pressure is applied
- Cost: Approximately $1 to $5 per one-inch elastic band versus $15 to $50 for a small commercial pressure immobilization kit or $20 to $100+ for comprehensive first aid kits
- Time: Application typically takes 2 to 5 minutes; should be applied as soon as possible, ideally within 10 minutes of bite, and maintained with regular circulation checks until professional care arrives (typically 1 to 6 hours depending on transport time)
- Limitation: Cannot neutralize venom or replace antivenom and definitive care; may worsen local tissue effects for cytotoxic venoms if misused; effectiveness depends on correct tightness and immobilization and is not universally recommended for all snake species
One-inch elastic bands are narrow (1 in / 2.5 cm) stretchable bands used to provide circumferential compression. This $1-$5 solution provides a low-cost, portable way to slow lymphatic venom spread compared to commercial pressure-immobilization kits priced at roughly $15-$50.
The process works through three key relationships: one-inch elastic bands apply circumferential pressure to the limb resulting in marked reductions in lymphatic transport (reported 50-90 in experimental models), immobilization of the affected limb reduces muscle-pump action enabling slower systemic spread of venom, and correct pressure preserves distal perfusion creating measurable signs such as palpable distal pulses and capillary refill under 2 seconds.
How to apply pressure immobilization with one-inch elastic bands step by step
- Call for help and assess (0-1 min): Immediately summon emergency services (EMS, 911 or local emergency number) and identify the snake only from a safe distance or a photo. Keep the victim calm and still. Result: Professional help is alerted; reduced heart rate and movement limit venom spread.
- Expose and note bite location (30-60 seconds): Remove constricting clothing/jewelry near the bite and note exact bite location and time. Do NOT cut or suction the wound. Result: Bite is accessible for bandaging and time-stamped for clinical teams.
- Gather materials (1-2 min): Use 1-inch (2.5 cm) elastic bands ($1-$5 each). For most adult forearms use 1-3 bands; for legs or thighs plan for 2-6 bands or a longer elastic bandage. If available, use a nonadhesive pad over the bite site first. Result: You have the correct supplies ready to form a distal-to-proximal pressure bandage.
- Apply padding over the bite (30-60 seconds): Place a small nonadhesive dressing or clean cloth over the bite to protect skin. Do NOT press directly on the fang marks. Result: Local wound protection while allowing compression over the area.
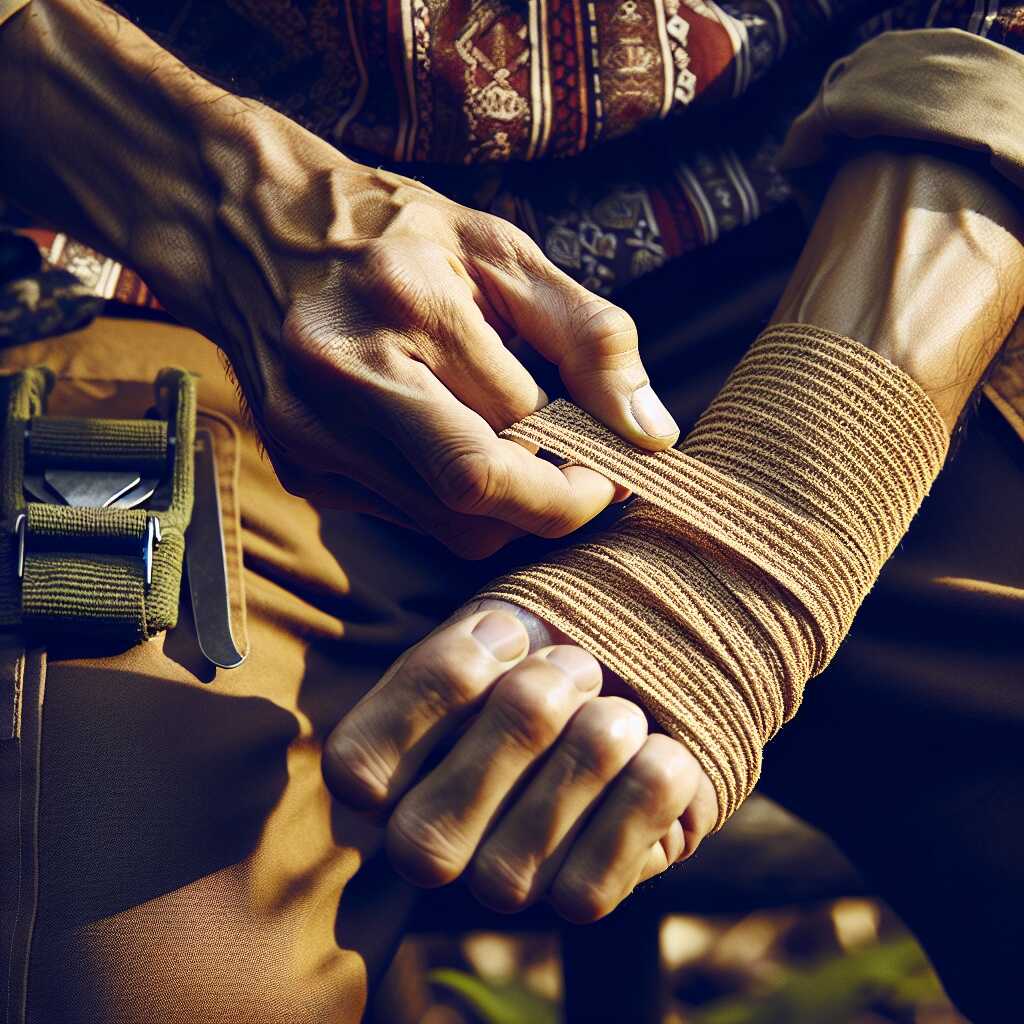
- Wrap circumferentially from distal to proximal (2-5 min): Begin at the fingers/toes and wrap upward past the bite site toward the body, overlapping each 1-inch turn by 50 so pressure is distributed evenly. Cover the entire limb segment (digit to shoulder for arm, toe to groin for leg) if possible. Tighten bands firmly but do NOT occlude arterial flow. Result: Broad, even pressure that compresses superficial lymphatics and slows lymphatic transport toward the trunk.
- Check tightness using distal signs (immediate; recheck every 5 min initially): Tightness goal enough to slow lymph flow but preserve arterial perfusion. Confirm by checking a distal pulse (radial/dorsalis pedis) and capillary refill (<2 seconds). If pulse is absent, loosen immediately until pulse returns. Result: Compression sufficient to impede lymphatic spread while maintaining blood flow.
- Immobilize the limb (1-2 min): Splint the limb and keep it immobilized against the body (arm across chest or leg supported). Limit movement; avoid walking if leg is bitten. Result: Reduced muscle pumping further slows venom movement.
- Monitor and document (every 5-15 min; maintain until care arrives): Check and record distal pulses, capillary refill, skin color, temperature, numbness, and pain every 5 minutes for the first 15 minutes then every 15 minutes thereafter. Maintain bandage for 1-6 hours until professional care, unless signs of arterial compromise appear. Result: Early detection of circulation loss or worsening local effects, continuous documentation for clinical providers.
- Prepare for transport and handoff (ongoing): Keep the victim still and warm, continue monitoring, and report time of bite, bandage application time, number of bands used ($ spent if relevant), and any changes to EMS or receiving clinicians. Result: Efficient handover increases chances of appropriate antivenom timing and care.
Important limitations and cautions: Do not use one-inch elastic bands as a tight tourniquet that stops arterial flow. Pressure immobilization is intended to slow lymphatic transport, not to neutralize venom antivenom and definitive medical care are required for systemic envenoming. PBI is most strongly supported for neurotoxic elapid bites (for example, in Australia); it can worsen local tissue damage with primarily cytotoxic venoms (some vipers). Clinical effectiveness in humans is variable; experimental models show 50-90 reduction in lymph transport but real-world success depends on species, correct technique, and timing. If distal perfusion is lost (absent pulse, worsening pallor, numbness), loosen the band immediately and seek urgent care.
FAQ
What is one inch elastic bands used for pressure immobilization
One-inch elastic bands are used to make a firm circumferential pressure immobilization bandage that slows lymphatic venom spread and holds the bitten limb still to buy time before antivenom or advanced care arrives. These 1.0 inch (2.54 cm) wide elastic strips provide a low-cost, portable solution that delivers consistent compression when applied correctly and tested in training scenarios. Predicament Measures provides practical guidance on reliability, testing, and best practices so users understand limits and do not treat the band as a substitute for definitive medical care.
What are the materials sizes and specifications for one inch bands
Suitable one-inch elastic bands are 1.0 inch (2.54 cm) wide elastic or woven synthetic strips that stretch about 20 to 50 and resist rolling under tension. Typical length needs vary by limb: fingers 10-15 cm, wrist 20-30 cm, forearm 40-60 cm, upper arm 60-80 cm, thigh 80-100 cm, and bands cost roughly $1 to $5 each compared with $15 to $50 for a small commercial pressure immobilization kit. Choose latex-free options for allergy safety, durable stitching for repeated use, and test compression on a non-emergency subject before field use to review comfort and performance.
How do one inch elastic bands create pressure immobilization step by step
One-inch elastic bands create pressure immobilization by applying even circumferential pressure over the bite site, then wrapping the limb distally to proximally and immobilizing with a splint to prevent muscle movement that drives lymphatic flow. Start by covering the bite with clean padding about 1-2 cm thick, then apply bands with 50 overlap across the padding, working from the fingers or toes toward the body and cover the limb to the joint above the bite; total application time is typically 2 to 5 minutes. Maintain the bandage and splint with circulation and sensation checks every 5 to 10 minutes and transport the patient to medical care within 1 to 6 hours depending on remoteness and local protocols.
What is the correct pressure tension and wrap technique to use
Correct pressure tension is firm circumferential compression that compresses superficial veins and lymphatics without occluding arterial flow, a working target roughly in the range of 40-70 mmHg or pressure that blanches superficial veins while a distal pulse remains palpable. Use a broad padded base at the bite, apply one-inch bands with 50 overlap and place multiple bands side-by-side to create a wide, even pressure surface, avoid a single narrow turn that can act as a tourniquet and cause focal ischemia. Practice wrap technique during training to improve reliability, review results in simulation, and test on volunteers to ensure the band feels firm, even, and comfortable yet allows a palpable distal pulse.
What are the main benefits of using one inch elastic bands in snakebite care
One-inch elastic bands provide a low-cost, lightweight method that helps slow venom spread, stabilizes the limb, and is easy to carry on hikes and in rural first-aid kits with a per-unit cost of about $1 to $5. Experimental data and animal testing show pressure immobilization can reduce lymphatic transport by roughly 50 to 90 when applied correctly, which can improve time to definitive care and reduce early systemic effects in some neurotoxic bites. The solution offers good durability and field performance, enhances first-response capability, and delivers an affordable, practical option that complements training and regional medical protocols.
How much can pressure immobilization reduce venom spread and symptoms
Laboratory and animal research reports lymphatic transport reduction in the range of about 50 to 90 with correct pressure immobilization, but human clinical effectiveness varies by snake species, venom type, and technique. For some neurotoxic envenomings pressure immobilization has helped delay the onset of paralysis by hours in reported cases and in clinical reviews, yet these outcomes depend on rapid, correct application and regional medical response times. Do not expect bandaging to neutralize venom or replace antivenom; use it only as a time-buying measure until definitive care arrives.
What are the risks and limitations of one inch elastic bands for snake bites
One-inch elastic bands carry risks including focal skin pressure, local ischemia, and potential worsening of tissue damage with cytotoxic venoms when applied too tightly or left in place too long. The bands cannot neutralize venom, cannot replace antivenom, and may give a false sense of security that delays rapid transport to definitive care; reported limitations include variable clinical benefit by species and incorrect tightness reducing effectiveness or causing harm. Use caution with narrow bands that concentrate pressure, monitor distal perfusion every 5 to 10 minutes, and remove or loosen the band if signs of severe ischemia develop or local medical advice instructs otherwise.
When should pressure immobilization not be used for envenoming
Do not use pressure immobilization for bites that are known or suspected to cause primarily local cytotoxic injury, for bites to the face, neck, chest, or genitals, or where local clinical guidelines advise against it. Many viperid and pit viper bites cause severe local tissue damage and regional protocols often recommend against firm circumferential bandaging for those species; regional variation exists so follow local EMS or poison control guidance. Seek immediate advanced care and antivenom when indicated and avoid field actions that could worsen tissue damage or delay definitive treatment.
Who should consider using one inch elastic bands for pressure immobilization
Outdoor hikers, campers, first responders, rural health workers, wilderness first aid instructors, agricultural workers, and pet owners in snake country should consider carrying one-inch elastic bands and learning proper pressure immobilization because these groups encounter delayed transport and can benefit from low-cost, reliable measures. Emergency medical services and wilderness teams that review research and practice pressure immobilization in training find the method useful for neurotoxic envenoming scenarios and it enhances prehospital care options. Predicament Measures recommends that anyone carrying bands include quality-tested, durable bands, review product comparisons, and perform practical drills to improve skill and confidence.
What training certification or skills are needed to apply it safely
Safe application requires hands-on training, such as Wilderness First Responder (WFR), certified first aid courses with snakebite modules, or EMS protocol training that includes practice drills and supervised skill assessment. Training costs vary by provider, commonly $200 to $600 for multi-day wilderness courses, and include testing, review of regional venom types, splinting practice, and repeated skill refreshers to ensure reliability in the field. Maintain regular practice, follow local medical control and poison center guidance, and use experience and reviews of equipment to choose durable, high-quality bands.
When is the best time to use one inch elastic bands after a snake bite injury
Use one-inch elastic bands as soon as possible after a suspected venomous snake bite, ideally within 10 minutes of the bite, because early pressure immobilization can slow lymphatic venom spread and provide the best chance to delay systemic effects. Studies and experimental data report lymphatic transport reductions in the range of about 50 to 90 with correct pressure in test models, so prompt application and reliable band placement matters for effectiveness and field results. Predicament Measures recommends fast, calm action, noting the band does not neutralize venom, does not replace antivenom, and does not suit all snake types or bites to the head, neck, or torso.
How long should one inch band be left on before medical care arrives
Keep the one-inch elastic band in place until qualified medical care or antivenom is available, typically for 1 to 6 hours depending on transport time and the situation. Check distal circulation every 5 to 15 minutes by testing capillary refill, skin color, warmth, and sensation; return time under 2 seconds indicates adequate arterial flow. Remove or loosen the band if you detect loss of pulse, numbness, worsening pain, or severe swelling and document the time of application for EMS and hospital staff.
How much do one inch elastic bands cost compared to commercial pressure kits
One-inch elastic bands cost about $1 to $5 per band for individual or roll purchases and offer a low-cost option for field pressure immobilization that helps many outdoor users and first responders. Commercial pressure immobilization kits typically range from $15 to $50 for a small kit and $20 to $100+ for more comprehensive first aid kits that include broad bandages, splints, and instructions, so users get a cost and quality comparison when choosing gear. Predicament Measures reviews equipment prices and recommends buying a durable, tested band or kit designed for snake country to ensure reliable performance and field readiness in 2025 and beyond.
What is the typical purchase price per band and per kit in dollars
Expect to pay about $1 to $5 per one-inch elastic band when bought singly or in small packs and about $15 to $50 for a small commercial pressure immobilization kit. Comprehensive first aid kits that include broader elastic bandages, splints, and extras commonly sell for $20 to $100 or more depending on brand and features. Look at user reviews, testing data, and product quality to choose a reliable, durable option that fits your budget and field needs.
What materials and tools are needed for one inch band pressure immobilization
You need one-inch elastic bands or equivalent narrow elastic strips, a way to secure ends like clips or medical tape, a splint to immobilize the limb, and a marker to note time of application; carry a small flashlight and phone for communication and documentation. Useful extras include a triangular bandage or wider elastic wrap to distribute pressure over the bite area if available, sterile cloth to cover wound for cleanliness, and an instruction card or training from expert wilderness first aid courses to improve technique and reliability. Predicament Measures recommends testing your kit, reviewing performance in training, and keeping simple, quality tools that help you deliver consistent pressure and immobilization in the field.
How do you check bandage fit and pressure with simple tools
Check bandage fit by sliding two fingers under the band to confirm a snug feel and by testing capillary refill on a fingertip or toe, where return under 2 seconds suggests arterial flow remains. Use a pen or light to check skin color and warmth, and mark the time of application with the marker to track duration; check these signs every 5 to 15 minutes to ensure safety and ongoing fit. If you have a simple pulse oximeter, use it to compare oxygen saturation and pulse rate distal to the band, which helps improve assessment reliability during transport.
What are the best alternatives to one inch elastic bands for snakebite
Best alternatives include a wide crepe or ACE elastic bandage that provides broader, even pressure, and a commercial pressure immobilization kit designed for snakebite that includes instructions and wider band material to enhance coverage and efficiency. A rigid splint plus a pressure bandage offers improved immobilization and can help reduce limb motion that drives lymphatic flow; a triangular bandage plus broad elastic wrap can also deliver proven results in many field settings. Predicament Measures suggests comparing options by testing gear in training, reading reviews, and choosing equipment that provides the best mix of reliability, durability, and ease of use for your environment.
When should you choose a splint or tourniquet instead of bands
Choose a splint when the bite is on a joint or when you expect prolonged transport and need to stop limb motion for hours, because splinting enhances immobilization and improves protection against movement-driven venom spread. Use a tourniquet only for life-threatening arterial bleeding or when limb life is at risk, not for routine snakebite pressure immobilization, because a tourniquet can cause ischemia, tissue loss, and harm if used without clear indication. First responders and rural healthcare workers should follow local clinical guidelines and training to decide when a tourniquet is appropriate and when to use splints plus pressure bandages instead.
What common mistakes should be avoided when applying one inch bands
Do not place narrow bands too tightly so they cut off arterial flow or cause numbness, and do not leave a single narrow strip directly over the bite without distributing pressure over a wider area because this increases the risk of local tissue injury and poor immobilization. Avoid cooling the bite, cutting the wound, sucking venom, or applying untested folk remedies because these actions do not neutralize venom and can worsen outcomes; focus on reliable pressure immobilization and rapid transport to medical care. Predicament Measures advises practicing application under expert instruction and using reviews and test data to select quality bands and training that improve field performance.
How do you fix and prevent compression errors and circulation loss
If you detect loss of pulse, severe numbness, or cool pale skin distal to the band, loosen or remove the one-inch band immediately and reapply with less tension and broader coverage to restore circulation. Prevent errors by wrapping with 50 overlap, spreading tension over more surface area with additional layers or a wider band, checking capillary refill every 5 to 15 minutes, and recording time of application for EMS handover. Training, practice, and regular review of technique help ensure consistent results and reduce the risk of serious compression injury.
Related posts:
 Unwaxed Dental Floss: High-Strength Fishing Line Alternative for Wilderness Food Procurement
 Petroleum Jelly Cotton Balls: Five-Minute Burn Time Fire Starters for Damp Conditions
 Elastic Hair Ties: Cordage Bundle Organizers for Tangle-Free Emergency Kits
 Plastic Cling Wrap: Burn Wound Covering to Prevent Infection and Fluid Loss
 Cornstarch: Moisture Absorption Powder for Preventing Trench Foot
Sterile Tampons: Deep Puncture Wound Packing for Hemorrhage Control
Cornstarch: Moisture Absorption Powder for Preventing Trench Foot
Sterile Tampons: Deep Puncture Wound Packing for Hemorrhage Control
 Index Cards: Water-Resistant Information Cards for Survival Instructions