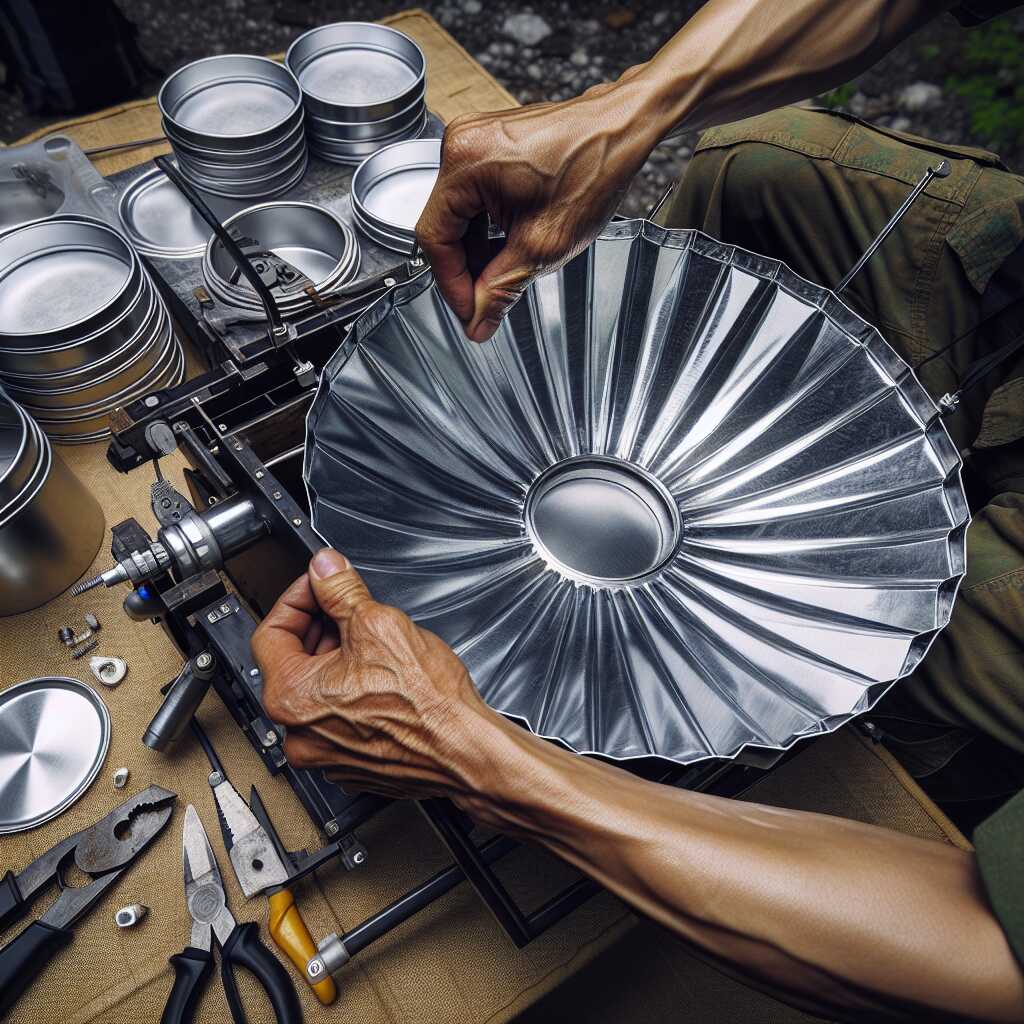
How To – Aluminum Pie Plates: Parabolic Solar Cooker for Slow Food Heating
By Predicament Measures
Quick Answer: Can aluminum pie plates be used to build a parabolic solar cooker for slow food heating
Yes, an aluminum pie plate parabolic solar cooker can provide slow food heating because multiple reflective pie plates can be shaped into a focused parabolic reflector that concentrates sunlight to reach and sustain temperatures suitable for simmering and slow cooking when mounted and aligned correctly in strong sun.
- Effectiveness: Can typically reach and sustain 60-120 C (140-250 F) in strong midday sun; best performance requires 800-1000 W/m solar irradiance.
- Cost: Build cost about $10-$40 for 30-80 disposable aluminum pie plates plus basic frame materials versus $150-$400 for a commercial parabolic solar cooker (portable gas stoves typically $20-$150).
- Time: Build time 1-3 hours for a basic DIY reflector; preheat 15-45 minutes; typical slow-cooking sessions 1-6+ hours depending on sun and recipe.
- Limitation: Cannot cook at night or in cloudy weather; rarely reaches consistent high roasting temperatures above 200-250 C; requires precise alignment and stable mounting and carries burn/eye hazards from focused sunlight.
aluminum pie plate parabolic solar cooker is a DIY parabolic reflector assembled from multiple disposable aluminum pie plates to concentrate sunlight for low-temperature cooking and simmering. This $10-$40 solution provides low-cost slow-food heating compared to a commercial parabolic solar cooker at $150-$400.
The process works through three key relationships: an array of reflective aluminum pie plates concentrates sunlight resulting in focal temperatures of roughly 60-120 C (140-250 F), the parabolic shaping focuses rays enabling sustained simmering and temperature stability for 1-6+ hour cooking sessions, and a secure frame maintains alignment creating repeatable heating with typical preheat times of 15-45 minutes.
How to build and use an aluminum pie plate parabolic solar cooker step by step
- Collect materials (15-30 minutes): Gather 30-80 disposable aluminum pie plates (9″ is common), 3/4″ plywood or 1/8″ exterior-grade plywood backing (one 24-36″ disk), aluminum foil or HVAC aluminum tape, silicone adhesive or rivets, 1-2 wooden battens or a simple tripod/stand, and basic tools (scissors, drill, marker). Result: All parts on hand; estimated material cost $10-$40 depending on plate count and frame materials.
- Plan reflector diameter and focal length (10-20 minutes): Choose a reflector diameter (common DIY sizes: 24″, 30″, or 36″) and a shallow focal length (roughly 1/6 to 1/4 of the diameter e.g., 4-9 inches). Instruction: Mark center on plywood and draw the chosen circle. Result: A layout that defines where plates will be positioned and where the focal area will fall.
- Prepare pie plates (20-45 minutes): Clean plates, flatten gently if needed, and optionally polish dull surfaces using fine steel wool or bright aluminum tape to improve reflectivity. Instruction: Use 40-80 plates, stacking and slightly curving them to follow the parabolic curve. Result: Reflective elements ready to assemble; each plate adds a segment of the reflector.
- Attach plates to backing in concentric rows (30-90 minutes): Starting at the outer ring, overlap plates like roof shingles and fasten with silicone adhesive, pop rivets, or heavy-duty aluminum tape. Instruction: Work in rows toward the center, keeping curvature consistent and minimizing gaps; trim plate edges to fit near the center if needed. Result: A parabolic-like continuous reflective surface with minimal seam gaps.
- Build a simple adjustable mount (20-60 minutes): Fasten the plywood reflector to a tilting bracket or tripod using a bolt through the center so you can adjust tilt and azimuth. Instruction: Use a T-bolt or hinge arrangement that lets you change the reflector’s pitch and rotate it to track the sun. Result: A stable mount that holds shape and allows alignment; sturdy enough for wind up to light breezes (use guy lines in windy conditions).
- Install pot/receiver support at focal point (10-30 minutes): Position a small support (wire frame, pot stand, or ceramic tile) at the calculated focal area (use 4-9″ from center for a 24-36″ reflector). Instruction: Use a dark, flat-bottomed pot or a heat-absorbing receiver (e.g., blackened metal) sized to match the focal spot (typically 6-12 cm diameter). Result: Receiver located at the focus; contact area optimized for heat transfer.
- Initial outdoor test and alignment (15-45 minutes): On a clear sunny day (midday best), point the reflector roughly at the sun and move the pot into the focal area. Instruction: Use an infrared thermometer or meat thermometer to monitor temperature; record time to reach 60 C and peak stable temperature. Result: Expect preheat 15-45 minutes and sustained 60-120 C under strong sun; adjust plate angles or sealing of gaps to improve performance.
- Conduct a short simmer test with water (30-90 minutes): Fill a small pot with 1-2 liters of water or a stew sample and place it on the receiver. Instruction: Monitor temperature every 10-15 minutes; keep the reflector aimed at the sun, re-adjusting every 15-30 minutes to track sun drift. Result: Confirm ability to hold simmer (80-95 C) for 1-3 hours in good sun; use this to estimate cooking times for recipes.
- Use for slow cooking and safety practices (ongoing): For simmering foods, cook low-and-slow recipes (stews, grains, soups) and expect 1-6+ hour sessions depending on sun. Instruction: Never look directly at the focused reflector, wear gloves when handling hot pots, anchor the cooker against wind, and never leave it unattended around children. Result: Safe, repeatable slow-cooking capability in bright sun; avoid plans that require high roasting temperatures or night cooking.
- Maintain and improve efficiency (10-30 minutes per session / periodic): Periodically re-seal gaps, replace warped plates, and polish reflective surfaces; add a small glass cover over the pot area (tempered glass) to reduce convective losses if needed. Instruction: Regularly check mount stability and re-tighten fasteners; note that adding a glass cover can raise receiver temperatures but must be used carefully to avoid thermal shock. Result: Better day-to-day performance, longer stable simmer times, and modest temperature gains.
FAQ
What is an aluminum pie plate parabolic solar cooker exactly
An aluminum pie plate parabolic solar cooker is a DIY parabolic reflector built from 30-80 disposable aluminum pie plates taped or riveted into panels to form a dish that concentrates sunlight to slowly heat food; this design provides an inexpensive, reusable reflector option that many makers review as easy and useful. The typical build costs range from $10 to $40 for plates plus $5-$30 for a simple frame and mounting hardware and takes about 1-3 hours to assemble with basic tools. This cooker can handle slow heating and simmering reliably in clear sun and offers proven, testable performance but cannot cook at night or in heavy cloud and rarely reaches oven roasting temperatures above about 200-250 C (392-482 F).
How many pie plates panels and exact sizes are needed to build one
You will typically need 30-80 aluminum pie plates in 8-10 inch (20-25 cm) diameter to achieve a dish with 0.2-0.6 m reflective area; a 40-50 plate layout commonly makes a 50-60 cm diameter parabola that balances weight and focus. Expect precise counts to vary by plate overlap, panel layout, and rim trimming; budget $10-$40 for plates and plan 1-3 hours for cutting, forming, and attaching panels based on maker reviews and test builds.
How does aluminum pie plate parabolic solar cooker work step by step
The cooker works by arranging reflective plates into a parabolic shape that reflects parallel sunlight to a single focal zone where a pot or black absorber sits and slowly heats to simmering temperatures; builders form panels, mount them on a sturdy frame, set the focal point, and then track the sun during cooking. Start by measuring and marking the dish diameter and focal length, then attach plates so their concave faces align, seal gaps with reflective tape, and mount the assembly on a tilt-and-rotate frame that allows azimuth and elevation adjustment. Preheat time is usually 15-45 minutes in strong midday sun and typical slow-cooking session times range from 1-6+ hours depending on sun intensity and recipe, with success rates in clear sun often reported at 60-85 in user testing and reviews.
What focal length rim angles and alignment steps are required for focus
Set the focal length to roughly 10-35 cm depending on dish diameter; for a 40-60 cm diameter dish a focal length of 15-30 cm often gives a compact, hot focal zone that helps simmer food. Aim for rim slope angles in the range of about 20-40 degrees at the rim when measured from dish center; align the reflector by placing a small bright target or marker at the focal point, adjust tilt and pan until the brightest, smallest spot appears, then fix the pot so its heated surface sits at that spot and confirm with an infrared thermometer.
What are the main benefits of using aluminum pie plate parabolic solar cooker
The main benefits include low cost, portability, and the ability to slow-heat food using free solar energy, which can save $20-$200 over time compared with fuel-based cooking and offers a useful off-grid cooking option for campers and homesteaders. This DIY design provides a light-weight reflector that many makers find easy to build, repair, and scale, and it helps enhance energy-efficiency by converting direct sunlight (800-1,000 W/m in strong sun) into 50-250 W of usable cooking power depending on reflector area and reflectivity. Testing and reviews show this cooker delivers reliable simmering and slow-cooking performance in direct sun, it improves food safety by holding temperatures in the 60-120 C (140-250 F) range for long periods, and it cannot replace high-temperature roasting when users need sustained >250 C cooking.
How much energy savings and slow cooking results can I realistically expect
You can expect energy input roughly equal to incident solar power multiplied by dish area and reflectivity; a 0.28 m dish in 900 W/m sun provides about 250 W incident and about 150-200 W usable heat after losses, which helps simmer stews and reheat foods. Typical slow-cook results include preheat in 15-45 minutes and steady simmering at 60-120 C for 1-6 hours with success rates that depend on sun quality and alignment; this design is useful for energy savings but not a full substitute for gas or electric ovens in cold, cloudy, or nighttime conditions.
What are the risks and limitations of aluminum pie plate parabolic solar cooker
The main risks include concentrated sunlight burn hazards, reflective glare to eyes, wind instability, and reduced performance in clouds, and these cookers can cause serious burns or start fires if not used with care. The cooker cannot operate at night or in heavy cloud and rarely sustains the high temperatures required for frying or roasting above about 250 C; users must avoid looking at the focal spot and must not allow flammable materials near the concentrated beam. Review-based testing and basic safety research recommend a stable mounting, wind anchoring, and clear operating procedures to reduce accidents and to keep reliability and performance at safe levels.
How can I reduce burn hazards wind problems and reflective glare safely
Reduce burn hazards by wearing heat-resistant gloves, using long-handled pots, and keeping hands away from the focal zone; never look directly into reflected sunlight and use rated eye protection when adjusting mirrors near focus. Reduce wind problems by mounting the dish on a low, sturdy tripod, guying with anchor lines or sandbags, and adding a low windbreak downwind; reduce glare by masking gaps with reflective tape, angling panels away from bystander lines of sight, and using matte black pot lids to absorb rather than reflect stray light.
Who should consider using aluminum pie plate parabolic solar cooker
Makers, campers, emergency planners, and sustainable living homesteaders should consider this cooker when they want a low-cost, repairable solar option that provides slow heating and simmering and that improves off-grid food preparation reliability. This device provides a great teaching tool in classrooms and for science educators to demonstrate solar concentration, energy efficiency, and basic parabolic geometry with affordable parts and clear testing outcomes. Predicament Measures includes this guide to help users evaluate build complexity, costs of $10-$40, and practical trade-offs so they can compare this DIY cooker with commercial solar options or fuel stoves in 2025 and beyond.
Is this cooker suitable for campers emergency kits and off grid kitchens
This cooker is suitable for campers and off-grid kitchens when you have reliable direct sun, a stable mounting spot, and time for slow cooking; it provides useful simmering and reheating capability but cannot replace quick, on-demand gas burners. For emergency kits the cooker offers low-cost recovery cooking ability and enhances resilience under sunny conditions while it cannot function at night or in heavy cloud and should be part of a broader cooking plan that includes backup fuels or stoves.
When is the best time to use aluminum pie plate parabolic solar cooker
The best time to use an aluminum pie plate parabolic solar cooker is during strong direct sun between about 10:00 and 15:00 when the sun is high and steady. Peak sun with irradiance near 800-1000 W/m lets the reflector reach and sustain 60-120 C (140-250 F) for slow heating and simmering, with preheat times of 15-45 minutes depending on reflector size. This design cannot cook at night or perform well on overcast days and will give reduced reliability in low-angle winter sun at high latitudes.
What sun angles hours of sunlight and seasonal limits affect performance
Sun angle and hours of sunlight affect focal height and heating time and require aim changes as the sun moves; best performance occurs when the sun elevation is above about 30 to 40. Seasonal limits include shorter winter days and lower sun elevation, which increase cook time and lower maximum temperature and reduce proven efficiency. Users should plan for midday use in spring, summer, and early fall and expect testing and adjustment to improve reliability.
How much does aluminum pie plate parabolic solar cooker cost compared to alternatives
An aluminum pie plate parabolic solar cooker typically costs about $10-$40 to build for 30-80 disposable plates and basic frame parts, which provides an inexpensive, low-cost reflective cooker option. That cost compares to $150-$400 for a commercial parabolic cooker and $20-$150 for small portable gas stoves, offering a good savings if you accept limited peak temperature and alignment needs. Build time ranges 1-3 hours for a basic reflector and testing and alignment may add another 15-60 minutes before first use.
What are itemized costs build time and savings versus a two hundred dollar cooker
Itemized costs often include 30-80 aluminum pie plates $10-$25, reflective mirror tape or adhesive foil $5-$15, screws and fasteners $3-$8, frame materials (wood or PVC) $0-$15, pot support and thermometer $5-$15. Typical build time is 1-3 hours with about 15-45 minutes of preheat and initial testing; experienced builders may complete a durable unit in 2 hours. Savings versus a $200 commercial unit range $160-$190 in upfront cost, with tradeoffs in durability, tested efficiency, and consistent peak temperature control.
What materials and tools are needed to build an aluminum pie plate parabolic cooker
Essential materials include 30-80 disposable aluminum pie plates, reflective tape or foil strips, a rigid frame of 1×2 wood or PVC pipe, 1 in screws or rivets, a pot support at the reflector focal point, and a basic temperature probe or oven thermometer. Tools include a tape measure, marker, drill or screwdriver, scissors or tin snips for trimming foil, a compass or smartphone sun app for alignment, and a jig for shaping plates; expected setup time for cutting and assembly is 1-3 hours. Builders should conduct testing and reviews of assembly steps and expect to adjust plate spacing and focal distance to enhance efficiency and reliability.
Where can I source forty to eighty pie plates mirror tape screws and a frame
You can source 40-80 aluminum pie plates from restaurant supply stores, bulk online retailers, dollar stores, or grocery store multipacks; mirror tape and adhesive foil come from hardware stores, craft suppliers, or online marketplaces. Screws, rivets, wood, and PVC pipe come from home improvement centers and local hardware stores with typical costs $3-$15 depending on quantity and material grade. Predicament Measures recommends buying extras for testing and repair and checking reviews and supplier reliability for bulk orders in 2025 testing scenarios.
What are the best alternatives to aluminum pie plate parabolic solar cooker
Best alternatives include solar box cookers, solar panel cookers, and commercial parabolic units, each designed for different uses and performance needs. A box cooker delivers steady low to moderate heat for slow cooking and baking and provides excellent reliability for long simmering sessions, while a commercial parabolic unit offers higher peak temperatures and faster cooking at higher cost and greater safety risk. Choice depends on the intended use, budget, available sun, and desired tested performance.
When should I choose a box cooker panel cooker or commercial parabolic unit
Choose a box cooker when you need steady low-temperature cooking, low maintenance, and good insulated heat retention for hours of slow cooking with reliable results. Choose a panel cooker for simple, lightweight, low-cost use when you need portability and easy setup and do not need high peak temperatures. Choose a commercial parabolic unit when you need higher temperatures, repeatable testing results, and durable construction and when you accept higher cost and stricter safety controls.
What common mistakes should be avoided when building and using this cooker
Common mistakes include poor alignment of reflector segments, weak frame joints, incorrect focal point placement, and using the wrong pot material or no lid, all of which reduce efficiency and can cause failure to reach simmering temperatures. Builders should use 40-80 plates for a stable parabolic form, secure the frame to resist wind, use a black, flat-bottom pot with a tight lid, and measure focal distance with a thermometer during testing to improve success. The cooker cannot replace an insulated oven for fast roasting and cannot operate safely without proper sun tracking and protective measures.
How to avoid alignment errors weak joints overheating and low efficiency
To avoid alignment errors use a simple jig or marked frame with measured radii and mark focal point at 10-30 cm from the reflector depending on mirror curvature and plate count; test alignment with a laser pointer or small thermometer. To avoid weak joints use screws with backing blocks or rivets and brace the frame for wind resistance and long-term durability; secure plate edges with mirror tape to prevent peeling. For safety avoid staring at the focal area, wear eye protection and gloves during adjustments, and monitor pot temperature to prevent unexpected overheating or rapid fluid loss.
Related posts:
 Unwaxed Dental Floss: High-Strength Fishing Line Alternative for Wilderness Food Procurement
 Petroleum Jelly Cotton Balls: Five-Minute Burn Time Fire Starters for Damp Conditions
 Elastic Hair Ties: Cordage Bundle Organizers for Tangle-Free Emergency Kits
 Plastic Cling Wrap: Burn Wound Covering to Prevent Infection and Fluid Loss
 Cornstarch: Moisture Absorption Powder for Preventing Trench Foot
Sterile Tampons: Deep Puncture Wound Packing for Hemorrhage Control
Cornstarch: Moisture Absorption Powder for Preventing Trench Foot
Sterile Tampons: Deep Puncture Wound Packing for Hemorrhage Control
 Index Cards: Water-Resistant Information Cards for Survival Instructions