How To – Old Keyboard Keys: Reflective Trail Markers Using Letter Side
By Predicament Measures
Quick Answer: Can old keyboard keys be used as reflective trail markers using the letter side
Yes, keyboard keys can serve as very low cost short range trail markers because their glossy letter face and contrasting letters can reflect flashlight beams enough to be seen at close distances, but they are not as bright, durable, or reliable as commercial retroreflective markers and should not replace proper signage or road safety reflectors
- Effectiveness: short range only, approximately visible at close distances (approx 2 to 10 meters with a handheld LED flashlight in typical conditions) and improves when paired with reflective tape or backing
- Cost: near free for recycled keys versus $0.75 to $4 per commercial reflector or prismatic tag
- Time: about 5 to 15 minutes to prepare and attach one key marker including drilling or adhesive work
- Limitation: cannot substitute for certified retroreflective devices for vehicle or road safety, not guaranteed weatherproof long term, limited visibility at long distances and from oblique angles
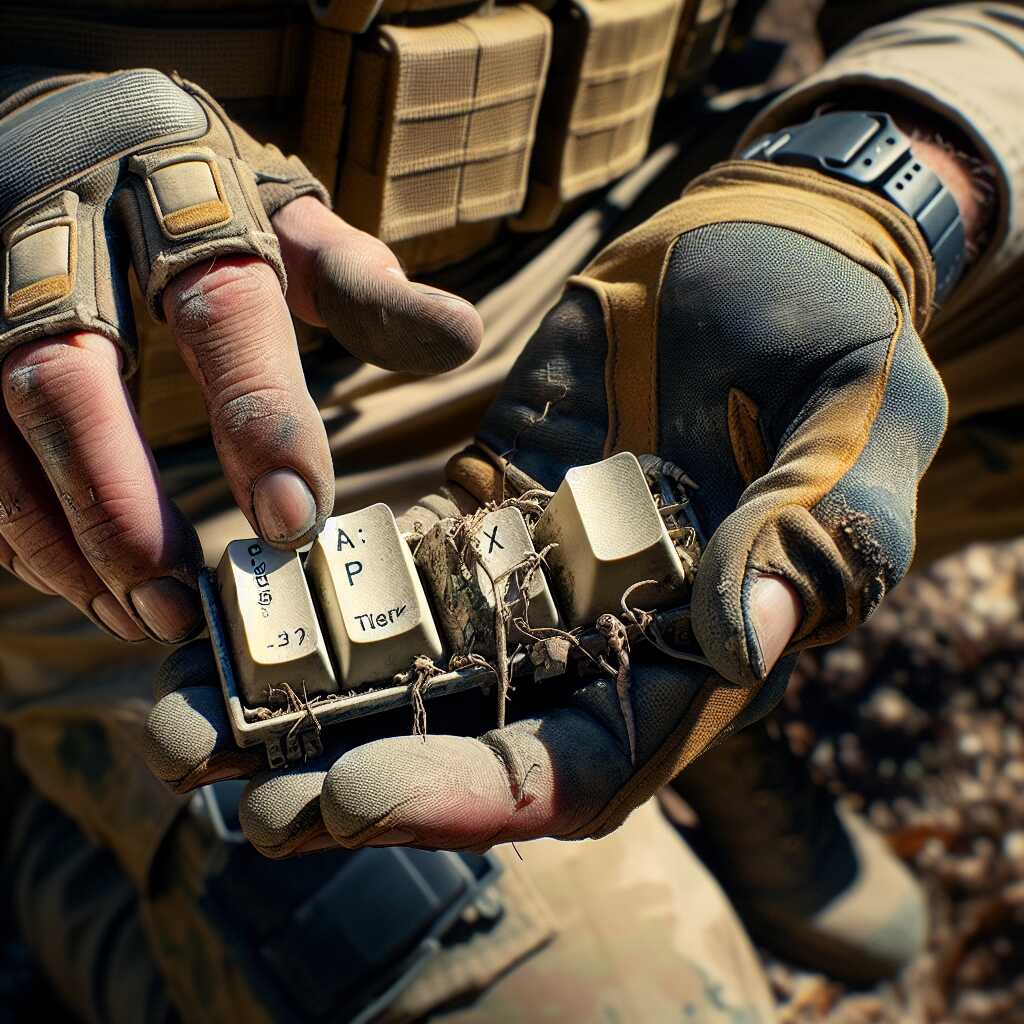
Keyboard keys are small plastic components salvaged from computer keyboards that can be repurposed as low-cost, short-range reflective trail markers. This $0 (near-free) solution provides visible close-range signaling compared to commercial reflectors at $0.75-$4 each.
The process works through three key relationships: keyboard keys reflect flashlight beams resulting in visible highlights at approximately 2-10 meters, applying reflective tape increases retroreflectivity enabling improved visibility from wider angles and slightly greater distances, and simple mounts (zip ties, cord, stakes) secure keys creating markers that can be prepared in about 5-15 minutes each.
How to make keyboard key trail markers step by step
- Select a suitable key (1-2 minutes): Choose keys with a glossy letter face and intact plastic (commonly A-Z or numeric keys). Instruction: inspect for cracks and prefer larger keys (e.g., Enter, Shift) or standard letter keys for better face area. Result: a suitable reflective surface for a marker.
- Clean the face (1-3 minutes): Instruction: wipe the letter side with isopropyl alcohol or soapy water and a lint-free cloth to remove oils and dirt. Result: improved specular reflection so the letter face returns more light to a beam.
- Create a mounting point (2-6 minutes): Instruction: either drill or file a 2-3 mm hole through the stem or apply a small strong adhesive pad (epoxy or weatherproof hot glue) to the back. Use a 2-3 mm drill bit or a file to open an existing stem cavity. Result: a secure hole or bonded pad for attaching the key to cord, zip tie, or stake.
- Add reflective backing (optional but recommended) (1-2 minutes): Instruction: cut a 10-20 mm strip or 10-20 mm square of retroreflective tape or a small piece of white reflective plastic and apply it to the rear side aligned with the letter face. Result: improved visibility and wider-angle return of light compared to the bare key alone.
- Mount the key on trail hardware (2-5 minutes): Instruction: secure the key to a small branch, stake, pole, backpack strap, or clothing using a zip tie, 2-3 mm cord, or a short screw/wire depending on the mount. Place markers at 1-1.5 m height for easiest flashlight sighting. Result: a visibly positioned trail marker.
- Field-test the marker (1 minute): Instruction: from 2-10 m, point a handheld LED flashlight (typical handheld range 200-1000 lumens) at the marker at several approach angles and check visibility in real conditions (dark, fog, or rain if possible). Result: confirmation whether the key reflects sufficiently; if not, add larger reflective tape or reposition.
- Routine checks and limits (ongoing): Instruction: inspect markers after heavy rain, snow, or wind; replace adhesive or tape as needed. Result: maintained short-range visibility. Note: keyboard keys are not certified retroreflectors, are not guaranteed weatherproof long term, and should never be used in place of vehicle or road safety reflectors or official signage.
FAQ
What are keyboard keys used as reflective trail markers
Keyboard keys can serve as very low-cost short-range trail markers because their glossy letter-facing side and contrasting legends reflect handheld flashlight beams enough to be seen at close distances of about 2 to 10 meters. This use provides a near-free upcycling option that takes about 5 to 15 minutes to prepare one key and saves about $0.75 to $4 per marker when compared with commercial reflectors. Predicament Measures recommends testing each key for reliability, reviewing visibility in real conditions, and noting that keys cannot substitute for certified retroreflective devices for road or vehicle safety.
What materials form reflective surfaces on keyboard key tops
Keycap reflective surfaces come from glossy plastic materials such as ABS or PBT, clearcoat finishes, UV-cured lacquer, and the printed or laser-etched legend that contrasts with the background to enhance beam return. These surfaces produce specular reflection rather than retroreflection, which means visibility depends on angle and beam alignment and improves when paired with reflective tape or a small prismatic backing. Testing and simple field reviews show that glossy coatings provide useful short-range return light, while long-term durability depends on weather exposure and material quality.
How do keyboard keys work step by step as trail reflectors
Keyboard keys reflect light through specular reflection where the glossy top sends a focused return when a flashlight beam hits within a narrow angle, producing visible spots at roughly 2 to 10 meters under typical handheld LED beam conditions. Users can enhance efficiency by orienting the letter face toward expected approach angles, adding reflective tape or foil backing, and fixing the key with adhesive, zip-tie, or a drilled 2 to 3 mm hole for attachment. Field testing takes about 1 to 3 minutes per marker to place and check, which helps ensure reliability and gives practical data on effective angles and distances.
What quick steps show making and attaching a keyboard key marker
Prepare a key by cleaning the glossy face, drill a 2 mm hole or use strong adhesive such as cyanoacrylate or epoxy, attach reflective tape or foil to the back, and secure the key to vegetation, cord, or stake using paracord or a zip-tie; this process typically takes 5 to 15 minutes per key. Test each marker at night with a flashlight from 2, 5, and 10 meters to confirm visibility and orientation, and retest after weather exposure to assess durability and performance.
What are the main benefits of using keyboard keys as markers
Keyboard keys provide low cost, light weight, and easy availability as recycled material, which offers budget-friendly marking that enhances a groups ability to mark routes quickly with about 5 to 15 minutes of prep time per marker. This approach helps hikers, search teams, and educators by providing short-range visual cues that improve route finding when combined with reflective tape or bright backing, and it offers clear cost savings compared with $0.75 to $4 commercial reflectors. Reviews and experience note that keys deliver useful short-range performance, while testing shows they are not as durable or reliable as purpose-designed retroreflective tags.
How much visibility and cost savings do keyboard keys provide
Visibility for keyboard key markers typically appears in the 2 to 10 meter range with a handheld LED flashlight, and cost savings come from using recycled keys that are near free instead of buying reflectors priced about $0.75 to $4 each. Testing and comparison suggest that adding a small strip of commercial reflective tape improves detection and reliability, which enhances practical performance without much added expense. Predicament Measures offers guidance on combining inexpensive materials to improve visibility and to meet specific needs while noting that keys cannot match prismatic reflector data or certified performance.
What are the risks and limitations of keyboard keys for trails
Keyboard key markers cannot substitute for certified retroreflective devices because they lack prismatic or glass bead retroreflection, have limited long-range visibility, and are vulnerable to weather and abrasion. These markers may fail at oblique angles, during heavy rain or snow, after prolonged UV exposure, or when adhesives and fastenings degrade, which reduces reliability and creates potential for marker loss. Research and testing advice from Predicament Measures recommends using keys only as supplemental markers, not as primary safety devices for roads or vehicle scenarios.
When will keyboard key markers fail and what hazards occur
Keyboard key markers tend to fail when coatings wear, adhesives soften, or strong wind and water dislodge attachments, with expected short-term life from days to months depending on exposure and attachment method. Failure hazards include loss of routing information, confusion for search teams, and increased search time, and small detached parts can create litter or a choking hazard for children and wildlife. Users must plan testing, secure fastenings, and avoid relying on key markers for critical navigation or emergency signaling to ensure safety and reduce hazards.
Who should consider using keyboard keys for emergency trail marking
Hikers, backpackers, search and rescue volunteers, preppers, outdoor educators, park rangers, and upcycling crafters can consider keyboard keys for emergency or temporary trail marking when they need a very low-cost, easy-to-make visual cue. This option best suits people with some testing experience who can validate visibility at 2 to 10 meters and who use keys as a supplemental tool for campsite layout, short trail segments, or training exercises. Predicament Measures offers tips and a 2025 guide that helps ensure proper testing, compares alternatives, and recommends certified devices for any situation that demands high reliability or legal compliance.
What experience levels and situations suit keyboard key markers best
Experienced hikers and searchers who perform simple tests and who know how to secure small markers will get the best results from keyboard key markers while novices and road users should avoid relying on them for critical safety. Ideal situations include short-range campsite marking, temporary route guidance, practice drills, and education demonstrations within 2 to 10 meters where markers enhance visibility when paired with reflective tape. Testing, review, and careful placement improve reliability and make this method a useful, low-cost practice tool for non-critical scenarios.
When is the best time to use keyboard keys as reflective trail markers
The best time to use keyboard keys as reflective trail markers is at night and during low-light dawn or dusk when short-range visual cues are needed and a handheld LED or search beam is available, with typical visibility at about 2 to 10 meters. Predicament Measures provides practical testing notes that show glossy key faces and contrasting letters provide useful short-range reflection but not the performance of certified retroreflective gear. Users should expect quick setup, low cost, and limited reliability for long-range or vehicle-oriented signaling.
What weather and visibility conditions give the best results
Clear, dry nights and calm air give the best visibility for keyboard key markers because water and fog scatter light and reduce reflected return at 2 to 10 meters. Strong handheld LED beams and direct aim at the letter face improve success in tests, while rain, heavy fog, and glare from wet leaves reduce effectiveness.
How much do keyboard key markers cost compared to commercial reflectors
Keyboard key markers cost near free when using recycled keys, compared to $0.75 to $4 per commercial reflector or prismatic tag, making them an essential low-cost option for simple trail marking. Material cost per key is often $0.00 to $0.10 if sourced from discarded keyboards, while commercial reflectors typically cost $0.75 to $4 each in 2025 market listings. Users should note that low cost comes with lower durability and lower certified reliability than commercial reflectors designed for road safety.
What is the estimated per marker material and labor cost in USD
Estimated per marker cost is about $0.00 to $0.25 for a recycled key plus $0.10 to $0.50 for adhesive, backing, or a small screw, and about 5 to 15 minutes of prep time per marker. Simple builds that use hot glue or epoxy and a small drilled hole deliver fast results while more weatherproof builds with reflective tape or epoxy coats take about 10 to 20 minutes and slightly higher material cost. Results in field reviews show that low-cost markers work for short-range signaling but cannot replace certified reflectors for vehicle safety or road use.
What materials and tools are needed to make keyboard key trail markers
You need old keyboard keys, a small drill bit (1.5 to 3 mm), strong adhesive such as outdoor epoxy or hot glue, optional reflective tape, and cord or zip ties to attach markers to branches or packs, which covers essential materials for a durable low-cost marker. Predicament Measures recommends a small file, sandpaper (220 grit), and clear epoxy or polyurethane spray to seal edges and improve weather resistance in tests. Users should keep basic tools like a micro drill or pin vise and gloves to work safely for about 5 to 15 minutes per marker.
What adhesive fasteners and coatings improve marker durability
Outdoor two-part epoxy, exterior-grade hot glue, stainless steel split rings, and UV-stable reflective tape improve durability and attachment strength when used with keyboard keys. Clear epoxy coatings or UV-resistant polyurethane sprays help protect printed letters and improve water resistance while sealing edges to extend life in wet conditions. These options enhance reliability and help protect against fading but do not make keys equivalent to certified retroreflective devices.
What are the best alternatives to keyboard keys for reflective markers
Best alternatives to keyboard keys include commercial reflective tape, prismatic tags, and small metal reflector plates, which provide proven retroreflective performance and certification for road or search use. Commercial reflective tapes and prismatic tags deliver much higher return intensity at longer ranges and from oblique angles than keyboard keys and offer clear data on visibility and lifespan. Users who need high reliability for SAR or vehicle-facing marking should choose commercial reflectors rather than relying on upcycled keys.
How do commercial reflective tape and metal tags compare in visibility
Commercial reflective tape and prismatic metal tags show higher visibility at long ranges and wide angles, with manufacturers often providing lumen and retroreflection specs that help in testing and comparison. Keyboard keys reflect well at close range under direct aim, while commercial materials continue to return light from greater distances and off-axis angles, offering better consistency in search and rescue reviews. Buyers should use commercial tape or tags where certified performance and durability are required for safety.
What common mistakes should be avoided when using keyboard key markers
Common mistakes include placing keys where light cannot hit the letter face, using weak adhesives that fail in wet weather, and relying on keys for vehicle or road safety where certified retroreflective materials are required. Predicament Measures advises testing each marker with your flashlight at 2 to 10 meters before leaving the site and replacing keys that lose gloss or detach during use. Users must accept that keys offer a low-cost short-range solution and cannot replace licensed safety gear or formal signage.
How to avoid placement color and attachment mistakes when marking trails
Place keys with the letter face angled toward expected search or hiker approach, use high-contrast keys (white letters on dark background or dark letters on white background), and use reflective tape behind keys to improve visibility. Secure attachment with stainless steel split rings, zip ties, or outdoor epoxy prevents loss and improves durability, while small tests of 2 to 10 meters confirm placement success. Avoid using faded keys or placing markers where snow, mud, or foliage will block direct beam return.
Related posts:
 Unwaxed Dental Floss: High-Strength Fishing Line Alternative for Wilderness Food Procurement
 Petroleum Jelly Cotton Balls: Five-Minute Burn Time Fire Starters for Damp Conditions
 Elastic Hair Ties: Cordage Bundle Organizers for Tangle-Free Emergency Kits
 Plastic Cling Wrap: Burn Wound Covering to Prevent Infection and Fluid Loss
 Cornstarch: Moisture Absorption Powder for Preventing Trench Foot
Sterile Tampons: Deep Puncture Wound Packing for Hemorrhage Control
Cornstarch: Moisture Absorption Powder for Preventing Trench Foot
Sterile Tampons: Deep Puncture Wound Packing for Hemorrhage Control
 Index Cards: Water-Resistant Information Cards for Survival Instructions