How To – Drinking Straws: Flutter Valve Creation for Chest Wound Management
By Predicament Measures
Quick Answer: Can a drinking straw be used to make a flutter valve for chest wound management
Yes, an improvised flutter valve made from a drinking straw can sometimes temporarily reduce the risk of tension pneumothorax because it can act as a one way vent that allows air to escape from the pleural space while limiting air entry. It is a temporizing measure only and is not a substitute for definitive care.
- Effectiveness: Unknown / unquantified (no highquality studies; anecdotal and case reports only)
- Cost: approx $0.05 to $0.50 for common materials versus $15 to $60 for a commercial Heimlich oneway valve
- Time: assembly typically 2 to 5 minutes; may temporize physiologic deterioration for minutes to several hours depending on injury and evacuation time
- Limitation: cannot definitively treat pneumothorax or replace a chest tube or surgical care; not sterile, may fail or worsen injury, and requires urgent evacuation to definitive medical treatment
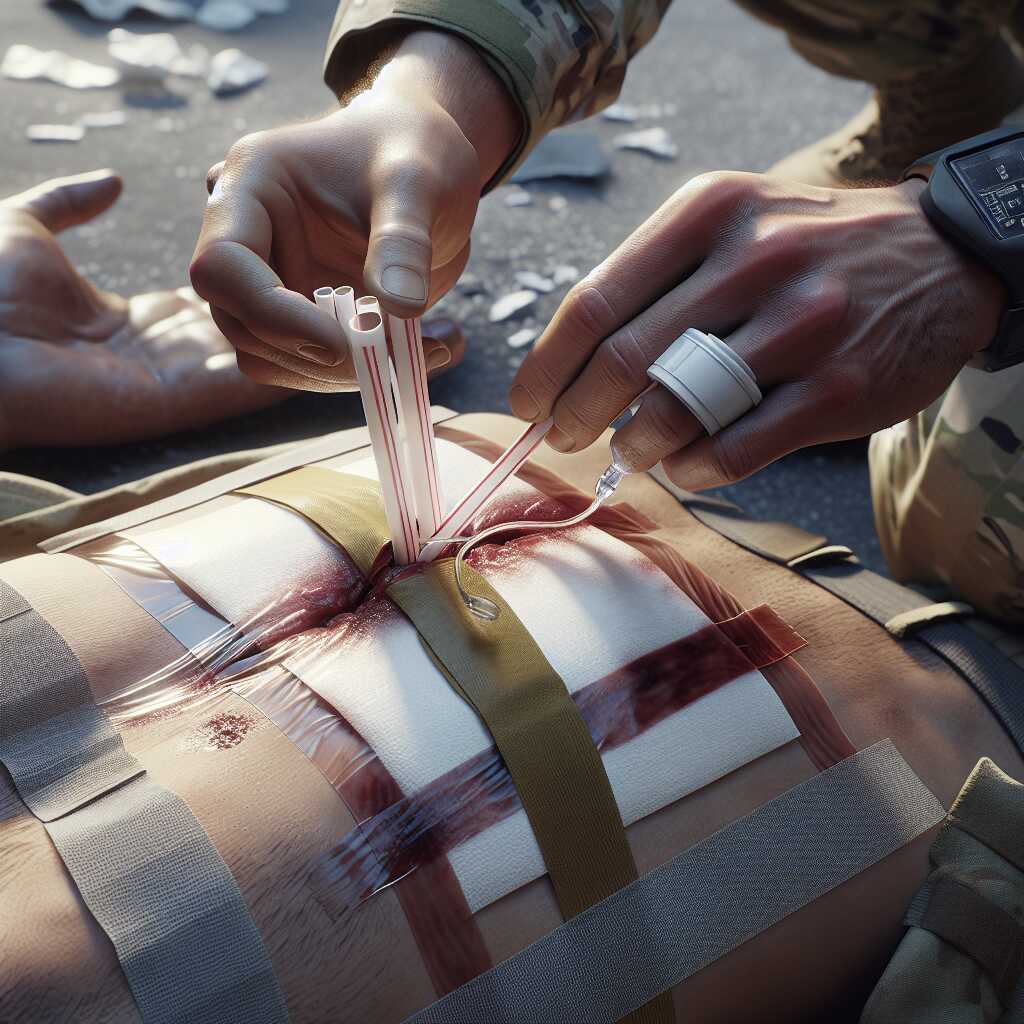
A flutter valve is a oneway vent placed over an open or “sucking” chest wound to let trapped air exit the pleural space while limiting air entry. This $0.05-$0.50 solution can provide a short-term, lifesaving temporizing benefit compared to a commercial Heimlich oneway valve that typically costs $15-$60.
The process works through three key relationships: a thin plastic flap or straw end directs air out of the thorax resulting in transient reduction in intrapleural pressure and slowed progression toward tension physiology, proper valve orientation and a close seal prevents or limits atmospheric air entry enabling net outward flow on exhalation, and rapid onscene assembly and testing creates a temporizing window of minutes to several hours for evacuation and definitive care.
How to improvise a drinkingstraw flutter valve step by step
- Assess and prioritize (30-60 seconds): Confirm an open/sucking chest wound with audible sucking, gaping wound in the chest wall, respiratory distress, or hypotension. If patient is not breathing or has no pulse, follow airway/breathing/circulation protocols first. Result: Decision to attempt temporizing flutter valve or other interventions.
- Gather materials (30-60 seconds): Clean drinking straw(s) (rigid 12-20 cm straw preferred), small clear plastic sheet or cut from glove/medical wrap (10 cm 10 cm), adhesive tape (cloth or waterproof), scissors or torn edge, and gloves if available. Cost: typically $0.05-$0.50 total. Result: All materials staged for assembly.
- Create a simple oneway element (30-90 seconds): Make a short valve by cutting one straw to 4-6 cm and, if possible, create a single external flap: use a second straw or a narrow strip of plastic to act as an external flap over the straw outlet and tape it so the flap opens outward with exhalation but lies closed with inward draw. Alternatively, a small strip of glove finger taped loosely over the straw end can act as a crude flap. Do not insert the straw deep into the wound. Result: A crude oneway element that can be tested by blowing into it (air should exit; on gentle suction it should resist inward airflow).
- Create an occlusive backing (30-60 seconds): Place the clear plastic sheet over the wound so the straw (valve) can sit on top of the plastic with its outlet pointing away from the chest. If a commercial chest seal is available, position the straw under the edge of the seal so air exits through the straw. Result: A plastic barrier that limits uncontrolled air entry around the valve.
- Secure and seal (30-90 seconds): Tape all edges of the plastic firmly to the skinseal three sides and leave the straw/valve area as the vent, or if using a full occlusive tape, ensure the valve opening is the only conduit. Use wide tape strips; press firmly. Result: Valve fixed in place with minimized leaks around the wound.
- Test function and monitor (15-30 seconds initial, continuous monitoring thereafter): Gently observe chest rise, listen for air movement at the valve, and check whether the crude valve opens with exhalation and resists inward flow. Monitor respiratory rate, oxygenation (if pulse oximeter available), mental status, and hemodynamics. Result: Immediate functional checkif valve allows outward air and limits inward air, it is working as a temporizing measure.
- Reassess and repeat as needed (continuous): Recheck every 1-5 minutes for increased subcutaneous emphysema, worsening respiratory distress, or valve failure (flap stuck, tape loosened). Replace or reseal if tape fails; total onscene time for interventions should remain as short as possible while arranging evacuation. Result: Ongoing temporary control while preparing for definitive care.
- Evacuate and document (variable, immediate): Arrange urgent transport to definitive care (EMS, evacuation). Communicate the improvised valve use, materials, and times to receiving clinicians. Result: Patient transferred for chest tube or surgical managementimprovised valve is not definitive treatment.
Clear limitations and cautions: This improvised straw flutter valve is a temporizing, lastresort measure for prehospital or wilderness settings. It is not sterile, it does not replace needle decompression for a confirmed tension pneumothorax or a properly placed chest tube, and it may fail (flap stuck, tape loss) or worsen the situation if misapplied. There are no highquality studies quantifying success rates for strawbased valves; use only when trained personnel judge benefits outweigh risks and rapid evacuation is planned.
FAQ
what is an improvised flutter valve for chest wounds
An improvised flutter valve for chest wounds is a makeshift one-way vent made from common items such as drinking straws, tape, and a short length of tubing that provides a temporary path for air to escape the pleural space while limiting air entry. Typical materials cost about $0.05 to $0.50 and a finished device is not sterile, unproven by large trials, and has unknown reliability with anecdotal reports only. Predicament Measures provides educational review of this improvised technique and warns that the valve is a temporizing measure only and cannot replace a chest tube or definitive surgical care.
how does an improvised flutter valve work in emergencies
An improvised flutter valve works by enabling air to leave the chest on exhalation while using a flap or one-way channel to resist air entry on inhalation, helping to reduce the chance of a tension pneumothorax. Typical straw inner diameters of about 3 mm to 6 mm and lengths near 100 mm to 200 mm shape flow, and simple testing and experience with the device before use helps ensure the valve opens and closes. Reports from field use in 2025 and earlier are anecdotal with no high-quality data showing exact success rates, so regular monitoring and rapid evacuation remain essential.
how to make an improvised flutter valve step by step
To make an improvised flutter valve, gather one or two drinking straws (3 mm to 6 mm ID, 100 mm to 210 mm long), 5 cm to 10 cm of adhesive tape, and a small piece of flexible film or a condom to form a one-way flap, then assemble in about 2 to 5 minutes using simple folding and sealing steps. Keep measurements specific: cut the straw to 50 mm to 80 mm if needed, attach the flap over one end with 10 mm to 20 mm of tape, and leave the other end clear to vent; practice testing on air in 30 to 60 seconds to confirm one-way flow. Field users should record the build time, note cost near $0.05 to $0.50, and review reliability through quick tests before applying the valve to a patient because this device is not a replacement for a chest tube or definitive hospital care.
what are critical safety steps when creating a flutter valve
Critical safety steps include testing the valve for one-way flow by blowing air through it for 10 to 20 seconds and securing it with 20 mm to 30 mm of tape to prevent displacement during movement. Maintain cleanliness as much as possible, monitor for valve blockage every 1 to 5 minutes, and prepare for evacuation within minutes to hours because the improvised device is not sterile, not proven by research, and can fail. Training, experience, and repeated practice with simulation enhance operator performance and help ensure safer application in real incidents.
what are the benefits of an improvised flutter valve in field care
An improvised flutter valve can provide an immediate one-way vent that sometimes reduces the build-up of intrathoracic pressure and may lower the risk of tension pneumothorax in the short term. The cost is low at about $0.05 to $0.50 compared with $15 to $60 for a commercial Heimlich valve, and field use can be fast with assembly in 2 to 5 minutes and potential physiologic benefit reported in minutes to several hours. Reliability and proven effectiveness are unknown; experienced providers and testing in training help improve the chance the device performs as intended during transfer to definitive care.
how much time can a flutter valve buy before hospital treatment
An improvised flutter valve can buy from several minutes to a few hours of physiologic stability depending on wound size, patient condition, and valve function. Assembly typically takes 2 to 5 minutes and anecdotal reviews show variable results with no reliable success rate in the medical literature. Clinicians and rescuers should plan for urgent evacuation and continuous monitoring because the device only helps temporarily and cannot handle definitive treatment.
what are the risks and limitations of improvised flutter valves in emergencies
Risks and limitations include valve occlusion, dislodgement, increased infection risk from non-sterile materials, and the possibility that the device will fail or worsen the injury; the improvised valve cannot replace a chest tube or surgical care. There are no proven data or high-quality research establishing reliable success rates, so reviews and comparison to commercial devices show only anecdotal results and limited testing. Predicament Measures emphasizes that this tool is a last-resort, temporary measure that requires careful monitoring, rapid evacuation, and expert definitive care.
what complications can occur after placing an improvised valve
Complications can include valve blockage causing recurrent tension physiology, increased air leak or subcutaneous emphysema, site infection, and accidental removal during transport. Watch the patient for rising respiratory rate, increasing work of breathing, falling oxygen saturation, or new hypotension and be ready to remove or replace the valve and seek definitive treatment. Experience and regular training help rescuers detect complications early and improve response in the field.
who should consider using an improvised flutter valve in the field
Experienced wilderness first responders, medics, military combat lifesavers, trained EMS providers, and skilled survivalists may consider using an improvised flutter valve when no commercial device or definitive care is immediately available. Lay rescuers without training should not attempt this unless instructed by an expert or medical dispatcher because the device requires testing, proper placement, and ongoing monitoring to be useful and safe. Predicament Measures recommends that only those with relevant training and review experience use this method as a temporizing measure during evacuation.
what training or experience is recommended before trying a flutter valve
Recommended training includes formal courses such as Wilderness First Responder, Tactical Combat Casualty Care, or EMS clinical training that include hands-on practice, simulation testing, and expert review. Practice building and testing the improvised valve until you can assemble and verify one-way flow in 2 to 5 minutes and perform repeated drills to enhance reliability and confidence. Regular reviews, experience in realistic scenarios, and comparison to commercial devices help rescuers choose the best, safest options during real incidents.
when is it appropriate to use an improvised flutter valve outdoors
It is appropriate to use an improvised flutter valve outdoors when a patient has an open or sucking chest wound with ongoing air leak and evacuation to definitive care will take about 10 to 15 minutes or longer. An improvised straw flutter valve can take 2 to 5 minutes to assemble and can sometimes reduce the risk of tension pneumothorax for minutes to several hours depending on injury and monitoring. This temporizing measure is not sterile, not a chest tube, and does not replace surgical care or emergency evacuation.
what signs of tension pneumothorax mean you must act quickly
Severe shortness of breath, falling blood pressure such as systolic under 90 mmHg, and rising heart rate above 120 beats per minute are signs that you must act quickly. Other urgent signs include tracheal shift, distended neck veins, absent breath sounds on the injured side, or rapid mental status change that indicate high risk of cardiovascular collapse.
how much does building a straw flutter valve cost versus commercial valves
Building a straw flutter valve costs about $0.05 to $0.50 using common straws, tape, and basic supplies while commercial disposable Heimlich one way valves typically cost about $15 to $60 each. The low material cost can help preppers, medics, and wilderness first responders when budgets or supply lines limit commercial product access. The improvised option has unknown effectiveness, limited reliability, and no proven outcomes data so it cannot replace trained care, sterile technique, or definitive chest drainage.
what are the price ranges for disposable Heimlich valves and kits
Disposable Heimlich valves and single-use one way valve devices commonly range from about $15 to $60 depending on brand, packaging, and included fittings. Multi-item kits that include chest seals, tubing, and a valve can vary widely in price and may cost above $60 to over $100 depending on vendor and included sterile components.
what materials and tools are needed to make a straw flutter valve in minutes
Essential materials include one rigid drinking straw or short length of small-bore plastic tubing, waterproof adhesive tape 25 mm to 50 mm wide, a small roll of gauze or clean cloth, and scissors or a knife for cutting; total assembly time is typically 2 to 5 minutes. Recommended straw sizes are standard drinking straw diameters near 6 mm or wider smoothie straws of about 8 to 12 mm and cut lengths of about 20 mm to 40 mm to form the valve component. Users must note that these items are not sterile, that testing and field experience are limited, and that this improvised device offers only temporary relief until trained care is available.
what sizes of drinking straws tubing and tape work best for chest seals
Standard drinking straws about 6 mm diameter and wider straws about 8 to 12 mm diameter work best for making a simple improvised valve when paired with tubing or a short rigid section. Tape that is 25 mm to 50 mm (1 to 2 inches) wide and rated waterproof provides the best seal around a dressing or tubing interface while allowing fast application and good adhesion on wet skin.
what are the best alternatives to an improvised flutter valve in prehospital care
The best alternatives in prehospital care are commercial one way valves such as Heimlich valves, finger or tube thoracostomy performed by trained clinicians, needle decompression using an appropriate catheter length such as 3.25 inches (8 cm) when indicated, and occlusive three-sided dressings for short-term management. Commercial devices deliver designed reliability, sterility, and testing that improvisations cannot match and often provide better results in field reviews and expert experience. Predicament Measures provides comparison guidance and reviews that help medics select reliable gear and plan for training and evacuation to definitive care.
how do commercial one way chest drain valves compare to improvised devices
Commercial one way chest drain valves are designed, tested, and manufactured to provide consistent performance, sterile packaging, and durability while improvised straw valves vary widely in reliability and lack formal testing. Commercial valves can handle continuous drainage for hours to days with known fittings and performance data, while improvised devices may function for minutes to several hours and require close monitoring and rapid evacuation.
what common mistakes should be avoided when making a straw flutter valve
Common mistakes include using cracked or very thin straws that collapse, failing to seal tape around the valve base, and placing any device without ongoing monitoring for respiratory decline; these errors reduce reliability and increase risk. Using non-waterproof tape, leaving loose edges that allow air to leak, and assuming the improvised valve provides definitive care are other frequent errors that can worsen outcomes. Field testing, experience, and careful review of the device after placement help ensure the best temporary performance until evacuation.
what signs show a poorly constructed valve is failing after placement
Signs of valve failure include worsening shortness of breath, rising heart rate, falling blood pressure, expanding neck veins, or increasing subcutaneous emphysema that may occur within minutes to hours after placement. Visible air leak at the dressing edge, loose or lifted tape, and new or worsening absent breath sounds on the injured side are direct indicators that the device is not working and that immediate reassessment and evacuation are required.
Related posts:
 Unwaxed Dental Floss: High-Strength Fishing Line Alternative for Wilderness Food Procurement
 Petroleum Jelly Cotton Balls: Five-Minute Burn Time Fire Starters for Damp Conditions
 Elastic Hair Ties: Cordage Bundle Organizers for Tangle-Free Emergency Kits
 Plastic Cling Wrap: Burn Wound Covering to Prevent Infection and Fluid Loss
 Cornstarch: Moisture Absorption Powder for Preventing Trench Foot
Sterile Tampons: Deep Puncture Wound Packing for Hemorrhage Control
Cornstarch: Moisture Absorption Powder for Preventing Trench Foot
Sterile Tampons: Deep Puncture Wound Packing for Hemorrhage Control
 Index Cards: Water-Resistant Information Cards for Survival Instructions