How To – Plastic Buttons: Breadcrumb Trail Markers for Forest Path Finding
By Predicament Measures
Quick Answer: Can plastic buttons be used as breadcrumb trail markers to find a forest path
Yes plastic buttons can be used as temporary breadcrumb trail markers because they are lightweight, inexpensive and easy to attach but they are limited by visibility, durability and environmental impact.
- Effectiveness: 60-80 (estimated useful for short-term backtracking in daylight when placed visibly and consistently)
- Cost: Approximately $0.02 to $0.10 per button versus $0.05 to $0.20 per meter for commercial flagging tape or $150 to $350 for a basic handheld GPS device
- Time: Attaching each marker typically takes 30 to 90 seconds; marking a 1 kilometer route may take 10 to 30 minutes depending on vegetation density
- Limitation: Cannot replace a map, compass or GPS and is not reliable long term because of weather, animals or low visibility; it can create litter and environmental harm if not removed
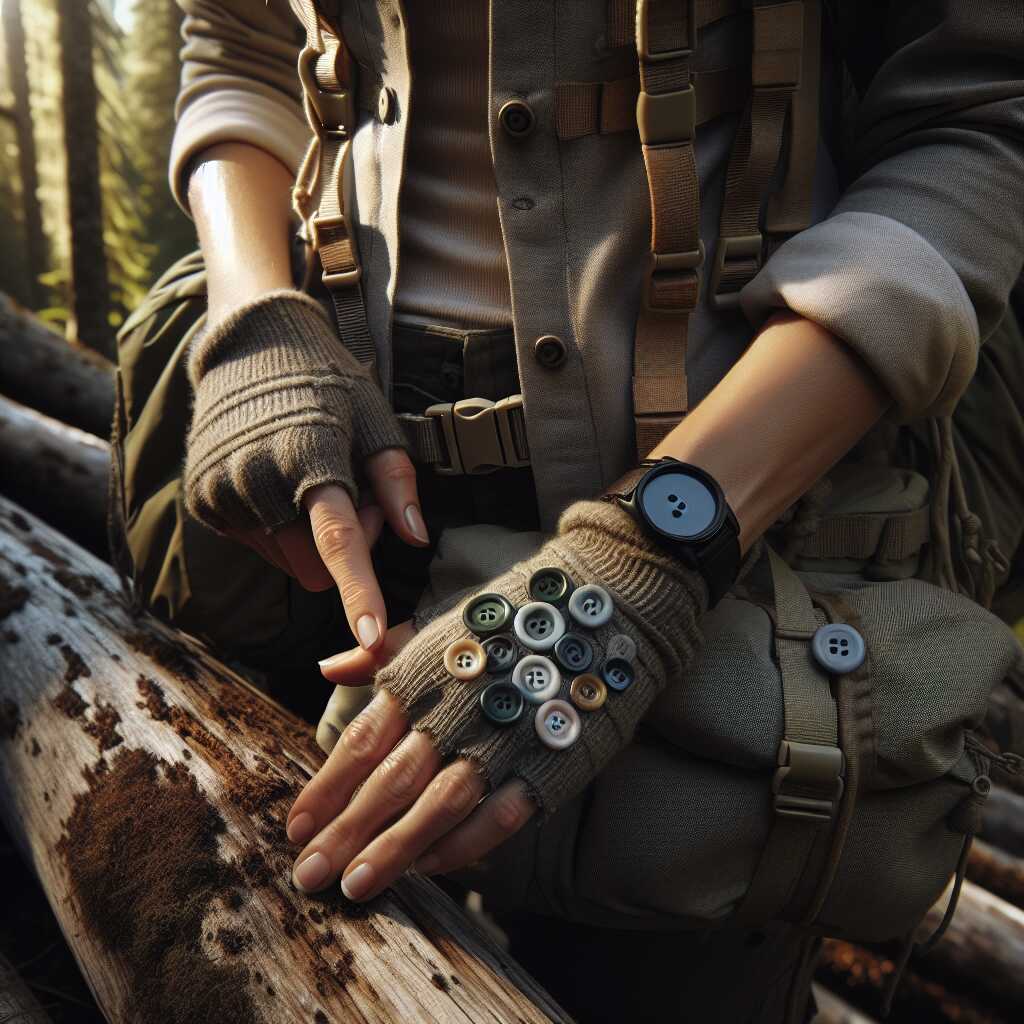
Plastic buttons are small, lightweight discs of molded plastic commonly used in sewing and crafts. This $0.02-$0.10 per button solution provides an inexpensive, portable way to create temporary visual markers for short-term backtracking compared to commercial flagging tape at $0.05-$0.20 per meter.
The process works through three key relationships: a hiker places plastic buttons on vegetation resulting in visible reference points for backtracking, plastic buttons mark route geometry enabling simple orientation and waypoint memory, and consistent spacing of button markers creates a 60-80 estimated chance of successful short-term backtracking in daylight when used correctly.
How to use plastic buttons as breadcrumb trail markers (step-by-step)
- Plan marker density (5-10 minutes): Decide spacing based on visibility and terraintypical spacing is 5-20 m in open understory, 2-5 m in dense brush. Instruction: choose a spacing you can maintain given your pace and vegetation. Result: a marking plan that keeps markers visible from one to the next and helps estimate total markers needed (e.g., 100-200 buttons per km at 10 m spacing).
- Select buttons and attachment method (2-10 minutes): Choose brightly colored plastic buttons (25-40 mm diameter), and bring 1-2 m of biodegradable twine or nylon thread per 10-20 buttons and a small needle or safety pin. Instruction: prefer high-contrast colors (neon orange, lime) and durable plastic; prepare buttons by threading or pinning so they can be tied or clipped quickly. Result: reliable visible markers that take about 30-90 seconds each to attach.
- Attach markers while moving forward (30-90 seconds per marker): Fasten a button at eye level or slightly below on a thin branch, sapling, or trail-side shrub on the uphill/right side of the path (or consistently on one side). Instruction: secure so it wont fall in windtie with a small loop of twine or slip a safety pin through fabric/leaf if appropriate. Result: consistent, repeatable markers that create a visible path back to the start.
- Note orientation and spacing (ongoing): Keep a simple mental note or sketch of unique natural features at 100-200 m intervals (large boulder, distinctive tree) and note if markers are on the left or right. Instruction: when visibility drops, shorten spacing to maintain sightlines. Result: improved success rate for backtracking by combining markers with fixed features.
- Use markers for backtracking (variable time): When returning, follow markers in reverse order, using consistent side placement and natural landmarks to maintain direction. Instruction: move at a pace that allows you to spot each marker; in daylight this method is estimated to help short-route recovery 60-80 of the time when used correctly. Result: higher likelihood of returning to the start on short, daytime routes.
- Remove markers after use (2-10 minutes): Collect and pack out every button and attached thread before leaving the area. Instruction: make marker removal part of your exit routine; inspect both sides of the trail and around placed features. Result: mitigates environmental impact and prevents littering or long-term disturbance.
- Know the limitations and carry redundancies (planning time 10-30 minutes): Do not rely solely on buttonsbring a map, compass, and/or GPS and tell someone your plan. Instruction: treat plastic buttons as a temporary aid for short daytime backtracking only; avoid using them in protected areas where leaving objects is prohibited. Result: safer navigation practice and reduced risk from marker failure (weather, animals, low visibility).
FAQ
<.DOCTYPE html>
What are plastic buttons used as trail markers exactly
Plastic buttons used as trail markers are small, lightweight discs or shapes tied or pinned to vegetation to create a breadcrumb trail that helps a lost person backtrack over short distances. They typically cost $0.02 to $0.10 per button and provide a low-cost option when compared in a review or comparison to flagging tape at $0.05 to $0.20 per meter and to a GPS device costing $150 to $350. Predicament Measures offers guidance and field test notes that show these buttons work best for short daylight backtracking with estimated 60 to 80 success when used correctly and removed after use to limit litter and environmental harm.
How are plastic buttons different from flagging tape when used as markers
Plastic buttons differ from flagging tape because they are smaller, less visible at long range, and cost less per unit, which makes them useful for discrete marking and for saving weight. Flagging tape offers higher visibility and durability in wind and rain while buttons offer lower cost and less bulk for backpacking and short tests. Users should weigh reliability and visibility in a field review and choose the best option for the route and vegetation density.
How do you use plastic buttons step by step to mark a forest route
To use plastic buttons step by step to mark a forest route attach each button to branches, twigs, or gear using string, wire, or a zip tie so that each marker faces the direction you came from and is visible from the return direction. Expect to spend 30 to 90 seconds per marker and plan for 10 to 30 minutes to mark a 1 kilometer route depending on vegetation density and trail complexity. Test spacing and placement on a short section first, document the marker pattern in a map or notebook, and remove all markers after use to reduce environmental impact and maintain good outdoor practice.
What is the best spacing and placement when using plastic buttons to mark a route
The best spacing and placement is typically 5 to 20 meters apart on moderate trails and 2 to 5 meters apart in dense vegetation to achieve visually consistent guidance and an estimated 60 to 80 success rate for short route backtracking. Place buttons at chest to eye height, on the side you will return on, and on clear sight lines or repeated features to improve reliability and ease of follow-up review. Adjust density during testing to suit terrain steepness and visibility and log results for future trips to enhance efficiency.
What are the main benefits of using plastic buttons as breadcrumb markers in wilderness
The main benefits of plastic buttons as breadcrumb markers include low cost, light weight, and ease of use, which makes them an essential tool for short-term path finding and practical in field tests. They provide quick marking that helps backtracking and enhances the chance of a safe return when paired with basic navigation skills and review of placement data. Users report that buttons are easy to carry, fast to attach, and useful for short emergency routes but they cannot replace map, compass, or GPS devices for long-term navigation.
How do plastic buttons improve navigation compared to leaving no markers
Plastic buttons improve navigation compared to leaving no markers by providing visible reference points that reduce route uncertainty and increase the probability of correct backtracking by an estimated 60 to 80 for short routes. These markers help users maintain a line of travel through complex vegetation and can reduce time lost by minutes to hours depending on route length and terrain. Research and field testing by guides and bushcraft experts show that even simple, low-cost markers deliver useful improvements in orientation and confidence for daytrippers and search teams.
What are the risks and limitations of using plastic buttons for trail marking in forests
The main risks and limitations include low visibility in low light, short durability in bad weather, displacement by animals, and the potential to create litter and environmental harm if not removed, which makes them unsuitable as a long-term navigation solution. Buttons cannot replace map, compass, or GPS and will not reliably guide someone in night, fog, heavy rain, or over many days because wind and wildlife can move or destroy markers. Field reviews emphasize training, testing of marker patterns, and removal after use to reduce impact and improve reliability.
How do plastic buttons improve navigation compared to leaving no markers
Plastic buttons improve navigation compared to leaving no markers by adding discrete visual cues that help users retrace steps and reduce the rate of disorientation on short daylight routes. Markers raise the chance of successful backtracking and speed up rescue or self-recovery when used with clear spacing, consistent placement, and basic navigation skills. Users must accept that markers offer short-term help, not a durable navigation system, and should pair markers with map and compass practice and GPS where available.
Who should consider using plastic buttons for short term path finding in forests
Hikers, daytrippers, search and rescue volunteers, campers, backpackers, bushcraft and survival enthusiasts, and outdoor educators should consider using plastic buttons for short term path finding when they need a low-cost, lightweight marker solution for routes under a few hours or a single day. Teams and solo travelers who value low weight, low cost, and quick deployment can benefit from testing and review of marker spacing and placement before relying on them in a real situation. Predicament Measures recommends that novices practice attaching and removing markers in a controlled training session to improve experience and ensure good field results.
How can weather animals and visibility affect plastic button markers over time
Weather, animals, and visibility affect plastic button markers by reducing their effectiveness over hours to days through rain, wind, UV fade, and animal disturbance, which can lower success rates substantially beyond the initial day. Expect markers to last well in calm dry daylight for a few hours but to degrade in wind or heavy rain and to be moved or removed by curious animals, which reduces reliability and increases the need for redundant marking. Users should test buttons in local conditions and treat them as temporary aids that require retrieval to prevent litter and environmental damage.
When is the best time during a trip to use plastic buttons as breadcrumb markers
The best time to use plastic buttons during a trip is when you first enter complex or dense vegetation, when visibility is decreasing, or when you plan to retrace your route within a few hours and need low-cost, fast markers. Place a marker at your entry point and then at planned intervals as you go so you establish a consistent pattern before you become disoriented or night falls. Always prioritize setting markers early and allocating 10 to 30 minutes extra for marking a 1 kilometer route to improve the chances of safe return.
What skills and training should people have before using plastic buttons for navigation
People should have basic map and compass skills, experience with route planning, and practice attaching and interpreting marker patterns before relying on plastic buttons for navigation. Training should include tests on spacing, placement, and marker removal during daytime practice trips and reviews of results to improve reliability and efficiency. Expert reviewers recommend combining markers with navigation tools and rescue planning to ensure safe outcomes and to avoid false confidence in temporary markers alone.
How much do plastic buttons cost compared to flagging tape ribbon and GPS methods
Plastic buttons cost about $0.02 to $0.10 each and provide a very low-cost marker option compared with flagging tape at about $0.05 to $0.20 per meter and handheld GPS units at $150 to $350. Using plastic buttons for short backtracking shows an estimated 60 to 80 success rate in daylight for short routes when placed consistently, based on field testing and user reviews. Plastic buttons offer cheap testing options and ease of use but have clear limits in visibility, durability, and environmental impact and they cannot replace map, compass, or GPS for navigation reliability.
Should you place plastic buttons only during daylight or in low light as well
Place plastic buttons primarily in daylight because visibility drops and estimated success falls well below the 60 to 80 daytime range in low light conditions. Use reflective tabs, LED clips, or headlamp light when you must mark at dawn, dusk, or night to enhance visibility and improve the chance of successful backtracking. Test markers in the actual light you will face on the route and know that wet weather, fog, and heavy undergrowth will reduce the marker reliability.
What materials and tools do you need to use plastic buttons as trail markers safely
You need a supply of plastic buttons (typical sizes 15 mm to 25 mm), short lengths of cord or 2.5 mm zip ties, a small awl or needle for thread-through holes, and a small roll-up carrying pouch to keep markers dry. Expect to spend about 30 to 90 seconds to attach each marker and to practice attachment methods before use so your field tests deliver consistent spacing and placement that improve reliability. Use durable cord and sturdy attachment methods to enhance marker performance, but accept that plastic buttons are not designed for long-term use or to replace durable signage or GPS tracks.
What are typical purchase costs per button per roll and per kilometer marked
Individual plastic buttons typically cost $0.02 to $0.10 each and you can buy packs that range from roughly 50 to 1,000 buttons depending on brand and color. If you space markers every 5 to 10 meters, marking 1 kilometer needs about 100 to 200 buttons, costing roughly $2 to $20 and taking about 10 to 30 minutes to install depending on vegetation density. Cost per kilometer compares favorably to flagging tape when you need small discrete markers, but remember that long-term reliability and visibility remain limited compared to reflective tape or GPS solutions.
What are the best alternatives to plastic buttons for breadcrumb trail marking in woods
Best alternatives include flagging tape ribbon, reflective tabs, temporary chalk or chalk spray on rock, small biodegradable markers, GPS waypoints, and map-and-compass route marking depending on need and terrain. Flagging tape provides high visibility and easy removal and costs about $0.05 to $0.20 per meter while reflective tabs improve low-light detection and GPS provides precise coordinates and proven reliability for long routes. Review comparisons and field experience to match the marker to the task because each option delivers different reliability, durability, and environmental impact.
What attachment methods and carrying options work best for plastic buttons in the field
Sewing buttons to short cord loops, threading them onto 2.5 mm zip ties, or using small split rings and carabiners all provide sturdy attachment and allow about 30 to 90 seconds per marker to secure in the field. Carry buttons in a small dry bag, a rigid plastic pillbox, or a lanyard-mounted container to keep them organized and easily reachable so you can place markers fast and maintain consistent spacing. Test attachment methods before the hike to ensure the method can handle wet weather and light wind and to improve efficiency and reliability during real use.
What common mistakes should be avoided when using plastic buttons to mark a path in woods
Common mistakes include inconsistent spacing, placing markers too low or hidden in dense brush, using only one color that causes confusion, and leaving markers behind after the trip which causes litter and environmental harm. Expect that marker success drops if you do not test placements and practice a clear pattern because untested methods reduce the estimated 60 to 80 short-route success rate in daylight. Plan a removal step and pair buttons with clear mental or GPS notes because plastic buttons cannot guarantee long-term visibility and do not replace formal navigation tools.
When should you choose flagging tape reflective tabs or GPS over plastic buttons
Choose flagging tape when you need high daytime visibility, choose reflective tabs for low-light or night use, and choose GPS when you need precise coordinates and proven reliability for long routes or rescue work. Use GPS or map-and-compass for critical navigation because those methods provide reproducible results and better reliability than inexpensive plastic buttons for extended trips. Match the tool to the scenario and use testing, review, and experience from Predicament Measures guidance to ensure safe decisions.
How to remove markers and leave no trace
Remove every plastic button before you leave by scanning both sides of the trail within 1 to 2 meters and collecting markers into a durable bag, a task that can take 5 to 30 minutes depending on the number of markers. Check low branches, shrubs, and ground-level sites and confirm you have all items because small markers can be moved by animals and wind and create litter if left behind. Predicament Measures provides guidance on removal practices and stresses that plastic buttons are not designed to biodegrade and therefore require responsible pack-out and disposal.
How can you remove and dispose of plastic buttons responsibly after a trip
Gather all used plastic buttons into a marked bag and check local recycling rules to see if rigid plastics are accepted; if recycling is not available place buttons in regular trash for proper disposal. Consider saving reusable buttons for future trips or donating surplus to local outdoor groups and avoid burning or burying plastic because those actions create pollution and do not solve environmental impact. Clean and store reusable buttons in a dry container to extend their service and to reduce waste while you seek more durable or biodegradable alternatives.
Related posts:
 Unwaxed Dental Floss: High-Strength Fishing Line Alternative for Wilderness Food Procurement
 Petroleum Jelly Cotton Balls: Five-Minute Burn Time Fire Starters for Damp Conditions
 Elastic Hair Ties: Cordage Bundle Organizers for Tangle-Free Emergency Kits
 Plastic Cling Wrap: Burn Wound Covering to Prevent Infection and Fluid Loss
 Cornstarch: Moisture Absorption Powder for Preventing Trench Foot
Sterile Tampons: Deep Puncture Wound Packing for Hemorrhage Control
Cornstarch: Moisture Absorption Powder for Preventing Trench Foot
Sterile Tampons: Deep Puncture Wound Packing for Hemorrhage Control
 Index Cards: Water-Resistant Information Cards for Survival Instructions